Thursday, August 30, 2018

Storm King's Thunder: Prepare to Die Edition [Part 7]

Storm King's Thunder: Prepare to Die Edition
* Last Updated 10/23/2018 *
WARNING:  Spoilers ahead for Storm King's Thunder.

View Campaign Page.

7.1 What To Do About Wooden Nickels

The party rests in Triboar while attempting to collect information on the strange coin.  After some days in town asking everyone about everything and dropping generous coins to jog everyone's memory, the party was still no closer to figuring anything out.  It may have stayed that way if it wasn't for Softhand's inkling that the coin may indeed just be a token.  A gambling token.

The party hires some mercenarios to fly the ship, Larry and his three brothers named Daryl.  They prove somewhat competent, if also a bit...strange.  Not too uncommon in Faerun, really.

The party arrives in Yartar and after some discussion with the Hand, they learn where the wooden gambling token came from.  There is a gambling hall called the Golden Goose, aboard a riverboat owned by one Lord Drylund, who is campaigning for Waterbaron of Yartar.  Once they found the ship at the docks, getting on board was as easy as dressing foppishly, talking fast and flashing cash.

Once on board, the party takes some time to get familiar with their surroundings, even spending time with Lord Drylund in his office where he made overtures to secure funding for his campaign for Waterbaron.  After casing the place, no clear threat is present.  The party eventually decides to gamble, and makes their way back to the main hall.


7.2 Casino Night

After a while gambling and carousing, the group is getting restless.

The evening on the Grand Dame winds on, and Starman performs a rendition of The Death of Harshnag that is very moving - perhaps the finest rendition ever.  It captivates most of the patrons, and even draws Lord Drylund from his chambers.  Drylund asks Starman back to his office, and begins to try to lure Starman into a performance contract on the riverboat.  The rest of the group follows, unsure of what is about to happen.

Yet before Drylund can get very far, Starman lays it all on him - who they are, and what they learned since the Eye of the All-Father.  Drylund, for his part, spills the beans pretty easily.  The party doesn't even really have to flex hard and he starts talking about his membership in the Kraken Society.

It appears this organization is behind Hekaton's disappearance.  As soon as they learn the name 'Slarkrethel', Drylund's eyes bulge and his whole body strains...then he dies.  However, Starman brings him back immediately with Eha's divine magic.  Drylund and Starman lock eyes for a moment in wonder and awe, then Drylund dies in the exact same manner as before.

Softhands, believing Drylund's octopus to be the culprit, grabbed ahold of it and earned a bite for his troubles.  The octopus was obliterated by hellfire shortly thereafter. Starman again revived the dead Lord Drylund, who declared he had had enough and begins to talk more earnestly.

The party now knows where the ship carrying Hekaton, the Morkoth, sails and have a rough estimate of it's course.


7.3 Eyes in the Sky

The party embarks on their airship and sets course for the supposed area the Morkoth can be found.  After several days sailing over the sea, the target is finally sighted.  The party maneuvers the airship above the Morkoth, far above them and out of range of the ballista.

After a few hours tailing the Morkoth, Ikki Popp polymorphs into a seagull and flies down to inspect the ship.  Ikki discovers Hekaton in the hold, bound in chains and evidently in some sort of trance.  The gull gets some strange looks, but it's not until the first mate sees the bird that the crew realizes that gull came from the airship.

At that point, a wizard rises from the ship, flying through the air with magic.  He watches the airship approach him, and casts a spell.  The airship lurched as it hit an invisible wall of force, and began to spin out of control as the Morkoth's ballistae began to fire.  Briar dispenses some pixie dust, and she, Berry and Softhands float to the deck of the Morkoth rather haphazardly.  Ikki shapeshifts into a dragon, and Starman climbs atop him to swoop down to the ship to aid their allies.

The fight on the ship is brief.  One of the crew stabs the hapless enemy wizard, and the enemy crew is swiftly dealt with.  Once the ship is quiet, the party scans the horizon and sees the airship in the water, retrieving the luckless Daryl from the drink and preparing to take flight again.


Return to Storm King's Thunder: Prepare to Die Edition.

Sunday, August 26, 2018

Star Wars Armada: Journey to Wild Space

The Rebels assembling near Roon would like to think they are ready to fight, but it is time to flee.

The Imperial Fleet has decided to devote resources to the fight around the Cloak of the Sith.  This bodes ill for the Rebels assembling there, so an exodus of the area has begun.  However, the Rebel fleet can ill afford a stand up fight at this point with an assembled Imperial fleet.  It is time to abandon the Cloak.

The plan is to move the Rebel fleet to a less conspicuous area somewhere in Wild Space.  In order to successfully accomplish this, the Rebels must contest Imperial Control in important strategic areas relevant to the movement of naval assets.  If a path can be safely navigated through Rebel controlled space, more of the fleet will be able to make it to the rendezvous point.

It's going to be tough...and there will be losses.  For the Rebellion, the other side of this trial will be only more fighting against an implacable enemy.  Yet hope lingers...and fosters courage still.


Journey to Wild Space is Iron Seer's 2018-19 campaign for Star Wars: Armada!

The fleets will battle over five nodes to generate a lockdown on each one.  Players must cultivate Projected Power if Imperial, or generate Resistance if Rebel.  When all the nodes are locked down, the campaign is over.

In addition, the fleets must marshal their resources in the form of Fleet Points.  Each fleet starts with 1200 Fleet Points, which may be spent on ships and upgrades to deploy during the battles.  At the end of each game there is Refit phase where Fleet Point adjustments are tallied for each fleet.

Battles are variable points totals, and players will bid an amount of fleet points to the scenario.  Typically this will be the maximum, but eventually players will want to conserve Fleet point in an effort to outmaneuver the enemy.  The player's bid becomes the point value of their fleet.

If a player feels they do not have enough Fleet Points to commit to the scenario, that fleet can make a concession of the game to the enemy.  This will allow the retreating fleet time to regroup, and the fleet will be awarded Fleet Points for doing so.

For each game, the Imperial player decides which node to fight over.  The players will randomly determine a scenario from the Journey to Wildspace scenarios list, below.  For each point of Projected Power or Resistance earned, that Fleet earns a Campaign bonus also chosen at random from the table below.  Play continues like this as players earn their respective objectives.

When a node has 5 points of either Projected Power or Resistance on it, it is locked and out of the game.  The battle there is over.  The campaign continues until each node is locked.  At the end of the campaign, the fleet with the most Projected Power or Resistance is the winner, with Fleet Points acting as tie-breaker.

The Nodes
  • Bothawui
    • Rebel assets in the polar bases are being removed and made ready for transport to the new base beyond the Unknown Regions.  The fleet's journey will begin here.
  • Ryloth
    • Some of the best Rebel troopers are marauders and gangsters, many of which hail from Ryloth and Roon.
  • Utapau
    • The largest of the Rebel fleet's ships have been waiting here for the smaller vessels to assemble, floating deep in-system.
  • Hoth
    • Both acquiring and delivering systems, weapons and munitions here, the Rebel fleet is careful to approach Hoth (and their new operating base) with discretion.  Much care was given to engaging Imperials in the nearby systems pre-emptively, deceiving them into believing the attacks were staged from another location entirely.
  • Jakku
    • The final jump-point for the fleet into Wild Space.  Failure to secure this node will mean a much rougher trip from another start point.

Journey to Wildspace Node Map
The rest of the galaxy is not represented, because we aren't concerned with that right now and I don't own the rights to this material.  So I had to make my own map, with node points and planet names.  Except it's not really a map, it's a starfield with some wild colors on it mean to represent Wild Space.  All trademarked names belong to Disney, k?  Whom I am NOT affiliated with, other than my having bought a game they licensed to Fantasy Flight Games.  I think I'll stop right here.


Journey to Wild Space Scenarios

If there are 3 or less points of Projected Power or Resistance on a node, determine the mission by rolling 1d6 on the following table.  If there are 4 points of either Projected Power or Resistance on a node, the scenario played is automatically Deathstroke.
  1. Battle Line
  2. Fleet Assault
  3. Patrol
  4. Escort
  5. Breakout
  6. Station Assault
Campaign Bonuses

For each point of Projected Power or Resistance earned, a fleet rolls 1d6 on the following table and obtains the corresponding bonus.
  1. Momentum
  2. Hyperspace Assault
  3. Fleet Command
  4. Fleet Points
  5. Initiative Bonus
  6. Fighter Deployment

Link to Bonuses.


Refit Phase
  1. Count up the total cost of all ships destroyed for each fleet.
  2. Each player gains Fleet Points equal to the points value of Enemy ships destroyed.
  3. Each player loses Fleet Points equal to the points value of own ships destroyed.
  4. A player who elects not to engage and concede Projected Power or Resistance to an opponent for a game gains 200 Fleet Points during Refit.  The winner of the concession gains none.

Sunday, August 19, 2018

Nether War: Strongholds of Good

Dungeons & Dragons: The Nether War
Never undress in a room with a window
...a Harper may be near.
Nether Warriors!

The base of your faction's power is here, goodly folk!  The time has come to defend the alliance's main staging areas and leadership centers.  Only the very best of our soldiers will be deployed here.

Indeed, these battles will be hard fought and bitter.  Beware your enemy's guile when they come to fight here, for it is now late in the war and time grows short for both sides.  Know that your sacrifices here work toward the good and betterment of all, so hold fast your nerves.


Tier 3 - Strongholds of Good

Jalanthar
The Stronghold of the Harpers during the Nether War, the small hamlet of Jalanthar has been reinforced by a small regiment of soldiers.  It has been relatively peaceful until recently, and the enemy will certainly wish to dismantle the support structure here.  Protecting the civilians is paramount if fighting breaks out, and if we are defeated here it will greatly affect the morale of the entire alliance.
  1. Scenario 1 - Approach to Jalanthar
    • D&D Attack Wing, 150 Legion Points
      • Setup:  Standard
      • Objectives:  Place an Objective Token in the center of the board.  The Good player places two Objective Markers anywhere in his deployment zone more than range 3 from another Objective Marker.  These represent strategic points that must be controlled in order to get into the hamlet.
      • Resolution:  The battle is over at the end of any turn when either Legion loses models totaling at least 100 points.  The Evil player must control at least one Objective in order to clear this scenario.  An Objective Token is controlled by a Legion that has a unit within Range 1 of the Token, and no Enemy is within Range 2.  The number of tokens controlled at the end of the game will contribute to the next scenario.
  2. Scenario 2 - In the Dead of Night
    • D&D Miniatures, 120 Point Skirmish
      • Quick Strike (85 point threshold)
  3. Scenario 3 - Assault on Jalanthar
    • D&D Attack Wing, 200 Legion Points
      • Setup: Standard.  This battle takes place high above Jalanthar at night, so only flying creatures can take part in this battle.  For each Objective Marker controlled at the end of Scenario 1, each player gets a 10% bonus to their Legion points.
      • Objectives:  Each player nominates one model as his General.  The game is over when one side loses their General.  
      • Resolution:  At the end of the turn in which a General is killed, count up Victory Points as follows.  Each model destroyed is worth it's total Legion points, and each model with Hit Point damage is worth half.    Models with only damaged Armor are not worth any points.  The General is worth +25 Victory Points.  The side with the highest total wins.
  4. Scenario 4 - Street Fighting
    • D&D Miniatures, 150 Point Skirmish
      • Plunder Run
When this base is cleared, the following boons are granted in the next scenarios:
  • D&D Attack Wing - The Evil Player receives two No Attack Tokens, which can be assigned to any model / unit at the beginning of the turn at the end of the Manuever phase.
  • D&D Miniatures - The Evil Player may make a Move action with up to half the models in his force at the beginning of the game, just before the first turn.


Lost Peaks Circle
The Lost Peaks are rarely traveled by outsiders, due to their remote location and mysterious inhabitants.  It is here that the druids of the Emerald Enclave meet to coordinate with their members all over the North.
  1. Scenario 1 - Scouting the Mountains
    • D&D Attack Wing, 150 Legion Points
      • Setup:  Players can deploy up to Range 2 in opposite corners of the map, up to half the board edge in either direction.  Take 9 Objective Tokens and put them in a pile to the side of the play area.  At the beginning of each Evil player turn, remove an Objective Token from the pile.
      • Objectives:  Divide the map into quadrants.  For each quadrant that contains a unit from the Evil side and no Good models, the Evil player gains 1 VP.  To win the game, the Evil player must score 2 or more VP.  The game is over at the end of the turn when the Evil player removes the last Objective Token.
      • Resolution:  For each VP scored by the Evil player, the Evil force receives one Scout Token during Scenario 3.
  2. Scenario 2 - Ryth's Precipice
    • D&D Miniatures, 120 point Skirmish
      • Reconnaissance in Force
  3. Scenario 3 - Where Dragons Dare
    • D&D Attack Wing, 200 Legion Points
      • Setup:  At the beginning of the game, each player places one model / unit in each of his two corners up to Range 1 from both table edges.  Place an Objective Token in the center of the board, representing the circle of stones.  At the beginning of each subsequent turn, each player can place a unit with it's base touching his table edge.  These models then place their dials during the Maneuver phase as normal.
      • Objectives:  The winner is the player with the most units within Range 2 of the Objective at the end of the game.  In case of a tie, the Good player wins.
      • Resolution:  The game is over when one player loses models equal to 150 Legion Points.
        • Scout Tokens:  The Evil player will have Scout Tokens granted from Scenario 1.  These can be used to either: 
          1. Deploy an additional unit anywhere along the board edge at the start of the game.  Only ONE Scout Token can be spent in this way.
          2. Make a (2) Maneuver at the end of any turn.  Only ONE Scout Token can be spent in this way per turn.
  4. Scenario 4 - Battle at the Circle
    • D&D Miniatures, 150 point Skirmish
      • Magic Statues
When this base is cleared, the following boons are granted in the next scenarios:
  • D&D Attack Wing - The Evil Player may add or remove 1 Duration Token to any card, model or effect in play.  This may be done once for each instance of each effect.
  • D&D Miniatures - The Evil Player receives 3 Onslaught Tokens at the beginning of the game.  An Onslaught Token can be used during a models' activation to generate a normal attack in addition to any other actions taken by that model.  Only one Onslaught Token can be used by any single model in a turn.

Sunday, August 12, 2018

When to Consider a New Edition

Travel to the Fun
Inspirobot thinks you should get out more often.
I like new games, I like old games.  I like all kinds of games.  There are certain things I don't like about things, and I voice my opinion on.  I have even been known to ACT on my own rhetoric.  So when DO you consider getting a new game, new edition or starting a new project in general?

It takes a lot of time and effort to do an entire table, with armies, from the ground up.  That's how I do it.  Faster than ever these days, but still it requires a significant investment.  You may feel that investments' value waxes and wanes along with how often you get to game, how many folks are playing that game, and a lot of other 'meta' considerations.

One major consideration may be how far that game has pushed you along the Edition Grind.

One of my biggest issues with that is it creates shelf trash, but this is mitigated if there aren't a lot of loose pieces for each edition to look after.  Not only that, but after a handful of decades you can get a little resentful at how some things get treated over time.  It's hard to explain and I don't really want to (again).  Let's just say that I understand how some folk don't want to play some games.

Even so, lot of folks know I've (not so) secretly been hoarding Warhammer miniatures this entire time.  We're going to see more on the site, I've decided.  Soon.  Yet, I think it's fairly obvious I won't be playing any 8th Edition 40k.

Yet.  I recently accidentally acquired a rulebook for both 7th and 8th Edition.  We'll see how that goes.  If I accidentally accumulate enough I might play through a few games just because.

For myself, I have found that taking such a hiatus from a particular game and working on something else for a while is exactly the cure for those ills.  It's been something like five years since I played a game of Warhammer 40,000...or any other Games Workshop game.  Now, I'm not so attached to the 'zeitgeist' of GW...and am no longer affected by it because I don't actively participate in it.

Sometimes, all you need to do is step away for a while.  Maybe five years or something.  Then, sometimes, you can reapproach the hobby from an entirely new angle.  I've already skipped 2 editions of Warhammer 40,000 entirely.

...but what happens when you feel the need to crush your enemies?  To see them driven before you?  To hear the lamentations of their models?  It's easy, even if you're new to the area or primarily play something the locals have never heard of.

Look around your area for gaming stores and clubs that might be active.  When you find one, see what they are into.  Scout the area out as it were...you may find that club to be your scene.  Then again, you may find that you don't fit into that community at all.  Don't despair, however...the guys at the game store or public club will only represent the surface of the community in your area.

Find out what games are being played at the local spot by the local bois.  If it's something you like, give it a go.  Show that you are willing to invest in the game and the community.  A proactive game group will really appreciate your enthusiasm.  If you can't find something you like, make yourself a presence there until something comes up that you actually ARE interested in.

In the games industry, there will always be new things coming up.  New games, new versions of games, etc.  Wait for the hype to build up around an upcoming game or new edition that the group is really into.  You can hit the ground floor running, and even if it isn't your favorite game it's still a fun experience with the group.

Don't feel pressured, though.  Don't feel bad if the hype passes you by.  You may find you are into some things, and not others, even though in principle maybe you should be into everything.

Whether or not you start a new game project should depend on a million factors, all of them entirely subjective.  Maybe X-Wing 2.0 is a bridge too far.  Maybe 9th Edition 40k will be your re-entry after your last edition, which happens to be 6th.  Maybe you're not into any of it anymore and want to play your old games.  Relax.

Oldhammer communities are burgeoning.

Sunday, August 5, 2018

Rogue Star Wars: Bothawui Run

Bothawui, where rebels yell.
Planet Bothawui, where it gets cold only sometimes.
After the close call with the pirates, the Rebel station at the Bothawui polar region was to be evacuated.  They knew it was only a matter of time before the Imperials figured out what was going on and came out to investigate, so the teams quickly moved to evade any so-called 'entanglements'.  After procuring most of the sensitive equipment and data, only a few sections of the base remained to be dismantled.

Reeling from casualties sustained in the earlier skirmish, the band of rebels attempts to upload a cache of sensitive deployment data to courier ships waiting in orbit.  Already on the way, unbeknownst to the rebels, was a team of Imperial Stormtroopers led there by an independent contractor, an outer rim bounty hunter.  We open as both teams close in on the transmitter...

All the rebels have to do is establish the uplink and complete the transfer.  The Imperials are inspecting the ruins, and are soon alerted to their presence.  It's a simple thing, to complete the transfer...nought but a few keystrokes.

BATTLE REPORT
Rogue Stars by Osprey Publishing

Rogue Star Wars Campaign 
Bothawui Rebel Attack on Imperials; Hacking Mission

Setup
Rebel Tech-Partisans vs Imperial Hunter-Killer Team

No complications were used for this match, despite what we were explicitly told to do.  We simply forgot.


Quickly and quietly, the Rebel team begins its advance back into the ruins...only vaguely aware of the precariousness of the situation.  Imperials weren't immediately expected, but little did they know that a mysterious bounty hunter had tailed the Buru brothers right to the ancient Jedi ruins.  By the time the Rebels had returned from the first phase of the evacuation, the contractor had returned with an Imperial patrol and were already sniffing around the site.

Bothawui Run 1
Let's just wait here and see if anyone shoots at them.
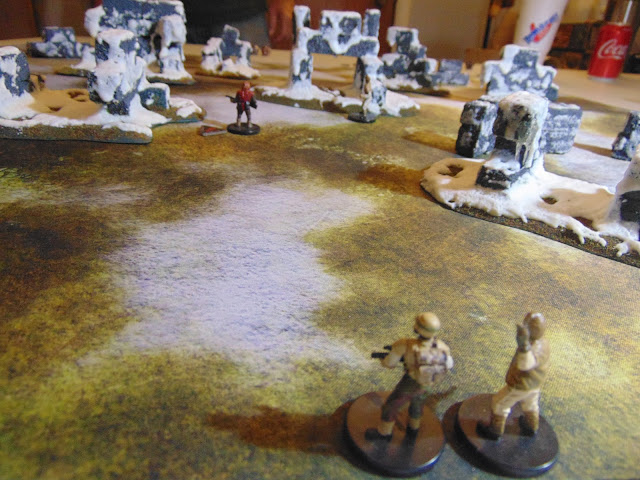
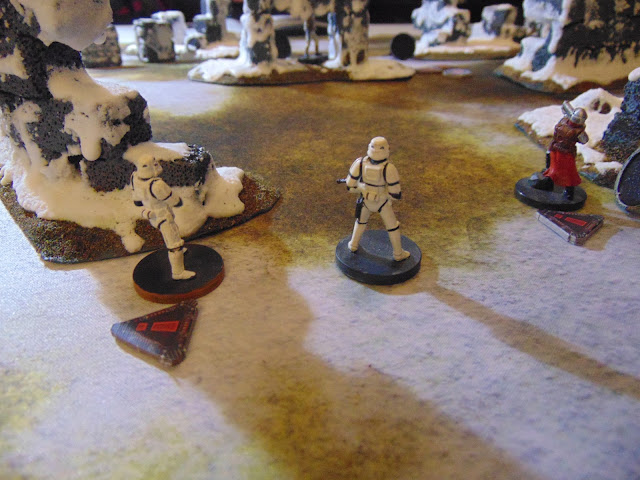
Imperials had the first activations, but were taking their time walking across the treacherous snow and avoiding those TN 8 Terrain rolls.  The Rebel Pathfinder and Bothan Commando took the first reactions to run as fast as they could toward the objective.  For a while, there were no targets in sight for either team.

Bothawui Run 2
This looks like a good spot to wait for someone to shoot.
It takes multiple actions to get anywhere.   At 2" each, you have to spend all 3 from 3 successful dice to get a 6" move.  It's kinda funny that it's more stressful to walk than run, but then I remembered they were walking in ankle deep snow slush over muddy ground.  Still, it's worth indicating that you should probably only walk where it's injurious to do otherwise.

After all, you could be shot.

Bothawui Run 3
Just take baby steps and you'll be ok.
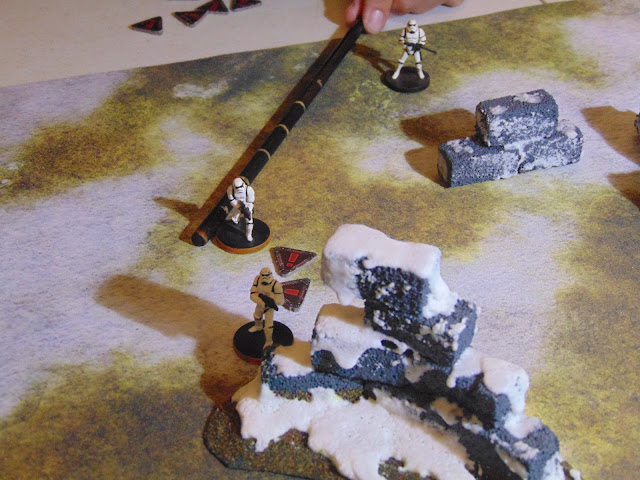
The stormtroopers moved to cover the center area of the board, as if they could feel the rebel presence long before they could see it.  Scan-darts should be a thing...but it didn't matter anyway.  The Imperials had Heavy Firepower, and knew how to use it - concentrated on one area.

Bothawui Run 4
Remember to cover your squadmates during leap-frog advances.  It's just plain rude not to.
The Rebels made it to the edge of the ruin where the uplink was concealed within the Jedi Temple's architecture.  The advance stalled there when they tried to move more elements up to repel the Imperial fire that was about to pour on the comm-station.  However, the Rebel team was at a pretty strong disadvantage for one reason:  the Rogue Stars campaign system for survival is quite brutal, and the Rebel team was already down two members to four at the outset of the game.

Bothawui Run 5
That's not reinforcements but ok...
Get to the comm-link, spend two actions and make a roll of 15+ on a d20.  That's all they had to do.  Things were going pretty good for the first few rounds of the game...

Bothawui Run 6
Hey, let me just plug in this data-spike and we'll begin the upload...
However, the Imperials were already in key positions overlooking the transmitter.  They must have detected the encrypted signals coming from the transponders hidden in the ancient rock spires.  It was mere seconds before the Imperials sighted movement and began their attack.

Bothawui Run 7
PLA-KET-KETT!
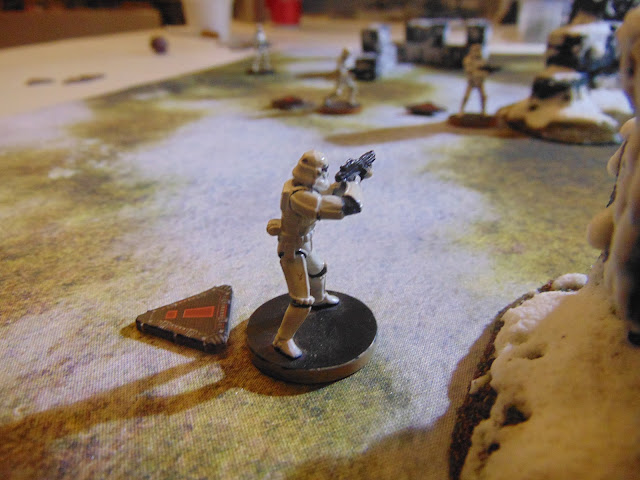
Fire was exchanged in all directions, and second rank guns moved up to take the place of those that went down.

Bothawui Run 8
Dammit, Jenkins...get in that hole and press the button!
After a few harsh rounds of fire using several Imperial Heavy Firepower tokens, two rebels were out of action and a single stormtrooper was stunned.  The Rebel Commando finally got to the scene and immediately began First Aid, owing to how brutal the campaign system is on fighters that go out of action.  Mainly, you're dead most of the time even if you're somehow stabilized.

Bothawui Run 9
Uhh...it's not working, sir?  I think it's because Jenkins is dead.
The Imperials poured on the fire, using the Heavy Firepower discipline until it was gone.  Once the Rebel Pathfinder went down, it was clear this was going to be an uphill climb for the Rebel team.  Still, they pressed forward, determined to get the last datastore uploaded and away from their enemies.

Bothawui Run 10
Anyone that runs is a Rebel soldier.  Anyone who doesn't run is a well-disciplined Rebel soldier.
The last remaining rebels dove for cover but it was no use.  They'd have to take more of the guns out of play.  After weathering the Heavy Firepower, they were already out of position and undermanned, but if they couldn't take out more troopers quickly they'd have to roll the dice on the upload.  The last remaining rebel, the commander, moved up to work the uplink and finish the mission, despite almost 100% casualties.

Bothawui Run 11
Who needs maneuver when you've got firepower and armor?
The commander managed a return shot before he was knocked prone.  Several shots from the Imperial fireteam melted the snow where he was lying before he could get the uplink finished as they raked the area with their guns.  They piled on a huge amount of pin tokens during their frantic deluge of blaster fire, as well as 3 wounds.  However, he was successful and punched the code...only to fail to get the thing to truly upload.  With that...the game was over.  The Rebel Commander retreated, leaving the fallen where they were.

Bothawui Run 12
We found a large number of pin tokens and a few wounds among the survivors, sir.
The Imperial team calmly reloaded their weapons after running out of ammunition and resumed firing into the structure.  The structure funneled the rebels right into their fire solution.  They didn't advance until there was no more movement on scanners, and then began searching the ruins for evidence of rebel activity, capturing all of the Rebel team except the captain.