Sunday, January 27, 2019

Frostgrave Forestry Service Announcement

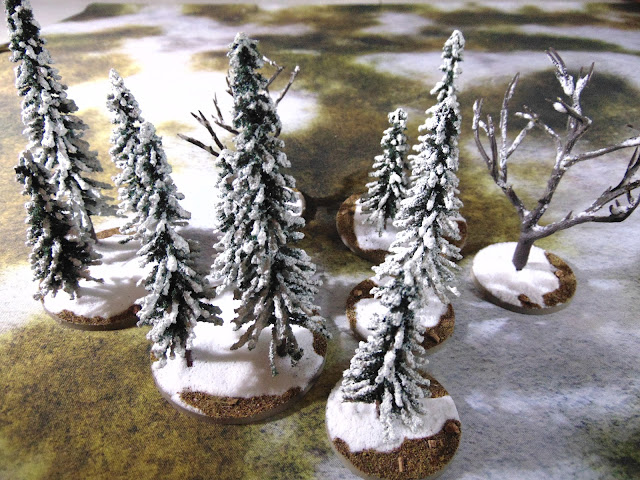
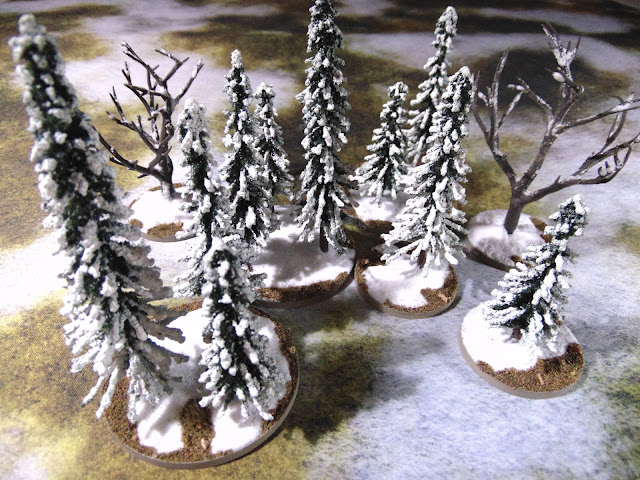
Frostgrave Snow-Covered Forest
Trees don't grow on the snow-covered tundra...but also magic, so who cares.
At some point I acquired some tree products.  I think they were intended for another project but were never used.  They had snow on them, so there was only one project I was working on that would make use of that.

Materials for Snow-Covered Forest
What my worktable does.
Super Scenic Snowy Evergreen Tree 10 pack for $12.99USD at the Hobby Lobby.  At first I was going to use foamcore as the bases for these trees like the other Frostgrave terrain I had done, but decided to use actual bases for no reason other than because I like it.  After checking around what I had on hand, I decided to use some large bases I had gotten from Reaper miniatures, just to feel decadent.

Reaper Large Bases
Krylon Camouflage, a great primer and basecoat.
Of course, we have to do a lot to these trees to make it cool.  I grabbed a few other spare things I had laying around.  The bare trees are Woodland Scenics trees I got in like 1998.  They've been a part of several different projects and at some point I had prepared them to be used again. Now's just a good time as any, really.

Frostgrave Snow-Covered Forest
These bases make for a far more fluid forest layout on the table.
I played with these quite a bit before committing to the arrangement.  I like how many different ways these can be used, either clumped or chained together to make area terrain.  Mimicry of such conventions is the #1 goal of making terrain like this.  I'm sure there are way better ways to do a model scene if you don't expect it to move or take much punishment.  These are TOUGH.

Frostgrave Snow-Covered Forest
The entire set, finished and on the table.
After attaching the trees, I applied snow to the bases and waited for it to dry.  I was told the pre-applied snow on the model trees clash with that on the base, and that might be true but I don't think you really notice it from the table.  I didn't put the flock and cork rocks down first this time...I learned my lesson with that Woodland Scenics soft-flake snow leaching color from it.  I waited to apply that after the snow had dried directly on the Krylon.

Frostgrave Snow-Covered Forest
30mm base sections (x4).
After that, applying the snow to the dead trees was interesting.  I give myself an 80%, but then again it's hard to satisfy myself.  Probably could use a smattering more on the dead trees' bark, in certain places.  I might do that next time I have the snow out.

Frostgrave Snow-Covered Forest
50mm sections (x3).
The last touches other than some cork rocks was some Winter Tuft by Army Painter.  A few, not many.  All in all, a respectable arrangement...if I do say so myself.  It will be interesting to add trees back into the Frostgrave, but these also help out to depict snow-covered forests from all over.  Notably, those near the Spine of the World.

Frostgrave Snow-Covered Forest
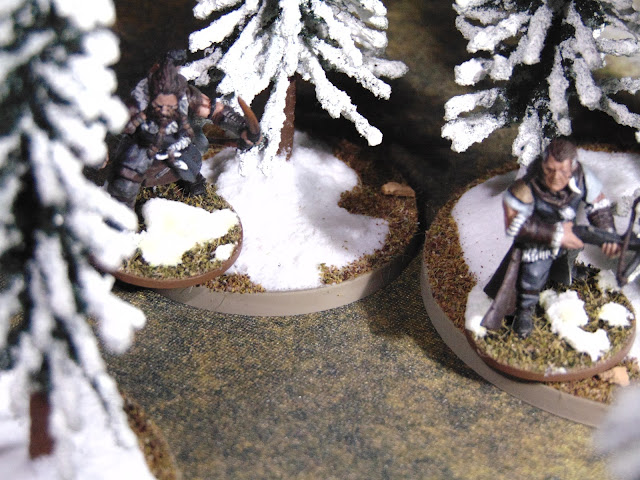
Even that smoke-belching, clanking abomination of a contraption will gain cover if it's in a snow-covered forest.
We can spread these out as scatter terrain, hence the use of the standard bases rather than large foamcore bases.  It does make it a little sturdier, but more importantly smaller and easier to store.  You can't always use bases like this, however - it can get costly pretty quick.

Frostgrave Snow-Covered Forest
Creep through the woods (like a boss).
If I do add to this forest I will have to use the same bases, but on a 3x3 board I'm pretty sure this is all the forest I'll need.  Combined with all the other stuff I've made for this board, I might have to consider getting a 6x4 version of the mat just so I can use the terrain I've built for all the other games!

Eh, that's a bridge too far.

Frostgrave Snow-Covered Forest

Friday, January 25, 2019

Long Arm of the Hutt [Part 1]

Star Wars: Mayhem, Inc.
On the Outer Rim, "law" is an ad-hoc affair.
Visit Campaign Page


Episode I

Our heroes, after springing Kali from the clutches of Teemo the Hutt, run for their lives down the streets of Mos Shuuta.  Chased by Gamorrean goons in the employ of the gangster, they duck into the nearest hole they can.  In a small cantina, the group stops to take stock of their situation.

The barkeep reminds them there's to be no trouble in the bar, and our heroes agree.  Phloid watches at the door for their pursuers, and the rest of the party begins to look for a way out.  The twi'leks get some sympathy from the twi'lek dancer, who persuades the barkeep to help the adventurers get out the back way, just as gamorreans and a trandoshan get hip to the hideout.

The group gets into the alleys of Mos Shuuta, and begins to prowl for a way out.  A ship is found in a nearby spaceport, and it's probably that of the trandoshan on their tail.  Turns out it needs a special part, and a favor is called in to get it from the salvage yard.

Just as a plot is hatched to get that ship loose from it's moorings, the gamorreans arrive.  The 'snouts' begin to act rather belligerent.  Phloid then asks them if they've ever seen a stun grenade.

The gamorreans had never seen a stun grenade, and apparently neither had Phloid.  The ineffective attack still distracted most of the gamorreans, but also made one really mad and he commenced the beatdown on the thief.  The that's when B3-T5Y and Kali stepped in to peel off the pig-folk.

It wasn't long before the snouts were in the sand, and the group moved to put the plan into motion.  Phloid, Rokka and B3-T5Y head to the command tower to get the ship's clamps released.  The rest of the group heads to the spaceport.

At the tower, little resistance is had.  A back door was found, and though locked provided little resistance.  Once the team was inside, there was a slightly closer call than expected when the security was tripped for a split-second.  However,  the tower crew must be used to faulty equipment, and the team extricated themselves forthwith.

At the spaceport, security was tight.  Stormtrooper patrols were thicker than normal, but the team went right to work getting to the ship, the Krayt Fang.  Even though it's owner was still inside, the team subdued the trandoshan bounty hunter quickly.  Some fast talking got the security droids confused enough to back off, but the Imperials were now very interested in the team.

The team swiftly crewed the ship and lifted off.  Immediately, TIE fighters were on the Krayt Fang.  After a few moments it became apparent that the big freighter was not going to be able to dogfight with three TIEs, so the team turned off the gamorrean opera the trandoshan had been blaring.

It becomes apparent there is a tracking beacon on the ship, as well as some nasty things the trandoshan had been up to.  As the ship pulls up out of the atmosphere, the repairs are finalized as the astrogation calculations have been set.  The ship and it's new crew jump to Ryloth.

Episode I [Continued...]

Having evaded capture by both the Hutts and Imperial forces aboard the hijacked ship of the bounty hunter, Trex, the crew discovers a twi’lek resistance leader held in the cargo hold. Running low on fuel and eager to avoid further confrontation with the Empire, they jump to hyperspace and head for the twi’lek home world of Ryloth.

Unfortunately, the ship has a tracking device attached to the hull transmitting its location to Teemo the Hutt. Whether they can deactivate it before Teemo’s hired guns trace them to Ryloth remains to be seen...
- GameDoc

The ship drops out of hyperspace near Ryloth, and the crew had been busy while in transit, plotting all sorts of skullduggery with their new ship, the Krayt Fang.  As soon as the ship was stable, B3-T5Y is tethered to a cable and moves out on to the hull of the ship to deal with the transmitter.  It was situated behind the cannon turret, and would have to be manually removed from the hull.

The group decides to take the resistance leader, B’ura B’an, to his people's hidey-hole on the surface of Ryloth.  As soon as this is decided, a ship appears on scanners approaching the Krayt Fang.  It is Thweek, a goon belonging to Teemo, who says something about how Teemo might go easy on them if they give up now.  Thweek began to ask questions about Trex, but shortly after began firing.

As the battle in space began, B3-T5Y was still on the outer hull of the ship.  She managed to yank the magnetic lock on the transponder free, but attached it to her frame in the process.  Phloid kept Thweep busy with nonsense talk for a few moments as the droid re-entered the ship.  Kali was on deck to help repair the droid and deal with the transponder, the end result of which was both B3-T5Y and Kali being on the receiving end of an electromagnetic discharge.

As the ship maneuvered to engage Thweek's ship, Phloid and Rokka dithered with the enemy ship's computers and speakers while Xander and B3-T5Y manned the guns.  It didn't take long before Thweep was damaged too much to continue and dove for the planet's surface.  The Krayt Fang did likewise, but in the other direction.

The miscreants arrive at B’ura B’an hideout, where they are greeted warmly.  They are put into a safe area of the complex and meet a few other refugees, but are suspicious of the situation and eager to be leaving.  There is much to deal with, and some transponders to slice.

Episode II

Still fleeing the wrath of Teemo the Hutt and having shot down the Hutt cartel’s spy, Thweek, in orbit around the planet Ryloth, the crew makes it way planetside hoping to refuel and lay low.

With the help of the rescued Twi’lek resistance leader, B’ura B’an, they are able to hide their stolen ship and find sanctuary among the resistance cell in the space port of Nabat...


-GameDoc

After a conversation with the Bounty Hunter Trex, Phloid managed to convince him that Teemo had 'overreached' his position and the other hutts are going to do something about it.  Trex didn't have to go down here, or with Teemo.  Striking a bargain that would the get the hunter on their side and restore Trex to his ship, the party set out to decide what to do next.

B’ura B’an requests that in exchange for repairs to the ship, he would ask a favor of the group.  He needs an escort to the ryll mines, and he thinks the party is just he folks to make sure it's a safe trip.  The group easily agrees, and board a speeder car to cross the planet's surface.

Out in the desert, the party begins to suspect something dire.  After glimpsing movement in the rocks, the group stops and hunkers down in the rocks.  To their surprise, they hear a voice call out to them.  It claims to be representatives of the local Imperial garrison and orders them to throw their weapons down and come out into the open.

Some subterfuge and lies later, and the would-be Imperials believe that the car is actually an ambulance and this is their crew.  The group uses the opportunity to lay an ambush around the bend, which is quickly sprung by their pursuers.  Thweek and two other hunters on swoops exit the cave complex, and are dealt with pretty swiftly when they don't comply with the group's demands.

The last bounty hunter ran further back into the cave complex.  Shenanigans ensued, and it turned out there was a young rancor down there in a sealed chamber.  Everyone ran back outside, and the group seized the hunter's swoops.  The last hunter was caught on the other side of the ridge and brought back as prisoner.

Episode III

On the planet Ryloth, the crew has been tasked with escorting Twi’lek resistance leader B’ura B’an safely back to his people at the ryll mines of New Meen.

After fending off multiple ambushes by bounty hunters in the employ of Teemo the Hutt, they crew beings to surmise that they share a common enemy with the Twi’lek miners...


- GameDoc

The hunter was easily convinced to join the group's efforts.

The group split up, with Rokka, Kali and the Doctor going into town while Modo, B3-T5Y and the newcomer flanked the town with the swoops.  X found a good spot to watch over the town with his rifle as we approached.  The place seemed quiet and subdued, except for a ruckus on the outskirts of town.

As Rokka's group approached, their speeder is commandeered by punks working for Drombb...the very developer the group had been sent to deal with.  It appears they were having trouble with their construction vehicle and needed a ride to the main compound.  Unwilling to make a scene here, the speeder was boarded by the thugs.

Modo's group saw this, as Rokka and company weren't proceeding according to plan and approached to cut off their advance toward the compound.  Upon seeing the thugs in the speeder, the swoops came in to block the road.  Modo and Rokka feigned a confrontation in the street to confuse everyone, and the group got the jump on and dropped the thugs.  They then waited, watching the compound, until nightfall.

X and Modo approach the compound, and after X surveyed the terrain Modo started prowling around the buildings.  He made his way inside, and after a bit of bumbling subterfuge managed to corner Drombb and disarm him.  X attempted to get the attention of the thugs outside, but not all of them.

Three of Drombb's goons make their way back around the building and stumble upon Modo and Drombb in an awkward position.  Modo sounds the alarm, and the group begins to approach the compound for an all-out assault.


Return to Campaign Page
Sunday, January 20, 2019

Edge of the Empire Player Characters

Edge of the Empire Player Characters
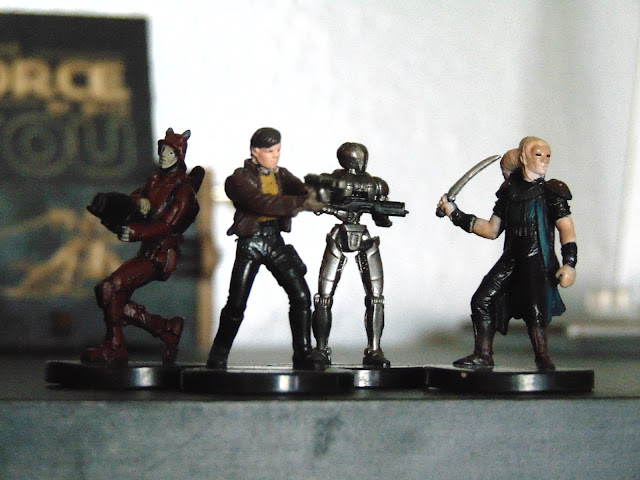
Our current crew!
WotC Miniatures Left to Right:  Devaronian Soldier, HK-50 Assassin Droid, Corellian Pirate, Twi-lek Scoundrel
I recently acquired some old Star Wars Miniatures for our Edge of the Empire campaign.  No particular reason, I just like to use Star Wars Miniatures for Star Wars games.  I mean I use non-Star Wars Miniatures for Star Wars games also, but I specifically collect Star Wars Miniatures for Star Wars games.  Is that enough keywords, Google?

Edge of the Empire Player Characters
WotC Miniatures Left to Right: Twi-lek Black Sun Vigo, Mission Vao
Anyway, it turns out that some of these are the most expensive collectible prepaints I've bought to date, weighing in at around the $5-20USD on the secondary market.  Mission Vao and the HK droid specifically were pretty expensive, but I typically don't spend more than a few bucks each on prepaints.  It's not bad though, and with Star Wars Miniatures it's one of the only ways to get an official model of certain characters.  I know I need to pickup some lightsaber wielders soon...and some clones.  We'll see how far I actually go down that rabbit hole once I've tracked down all the Attack Wing and X-Wing 1.0 stuff.

I thought it would be cool to kit out our team as a Rogue Stars unit!  A team of Pirates, aggressive and to the point.  The Hard to Kill tactical discipline and the Difficult Target traits will make this team an annoying and dangerous foe, just like our group.  However, two of our players had to bug out during the campaign, so I let their characters take a vacation.

Anyone can use this team in Rogue Star Wars!  Just in case anyone wanted to rough some stuff up, our merry pirate band can fight any other team.  Even other scum.  ESPECIALLY other scum.


Mayhem, Inc. (Pirates)
Hard to Kill

  • Rokka Reer, Twi-lek Entertainer (50)
    • Difficult Target (2), Fast (2), Fire into Melee, Free Disengage, Perceptive (2), Reactive
    • Sonic Pistol, Knife, Kevlar Jacket
  • X, Devaronian Scout (49)
    • Agile (2), Alert, Danger Sense, Difficult Target (2), Marksman (2), Stealth (2)
    • Laser Rifle, Knife, Kevlar Jacket
  • B3-T5Y, Combat Droid (50)
    • Artificial, Nonreactive, Difficult Target (2), Steadfast (1), Tough (1)
    • Laser Rifle, Force Glaive, Light Combat Dress
  • Modo Phloid, Thief from Outer Space (50)
    • Alert, Difficult Target (2), Fire into Melee, Free Disengage, Stealth (2)
    • Laser Rifle, Knife, Kevlar Jacket, 3 Stun Grenades


Sunday, January 13, 2019

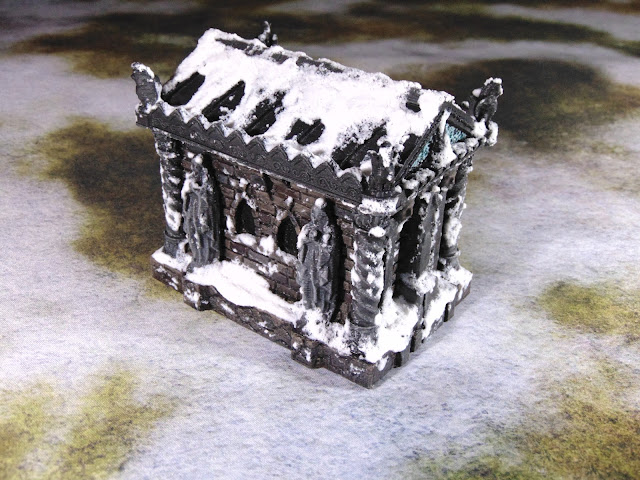
Frostgrave Mausoleum

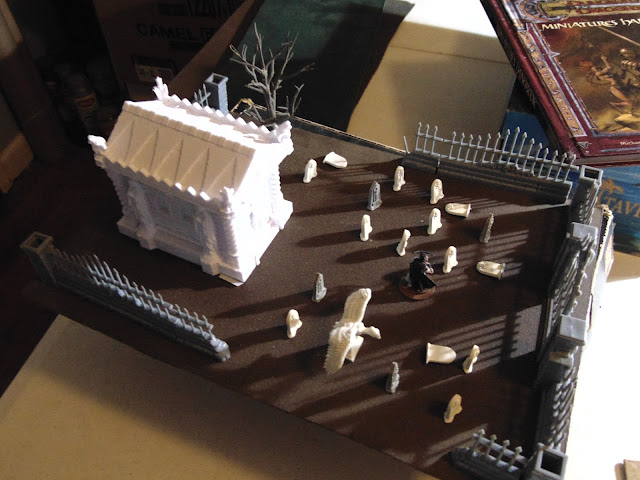
Frostgrave Graveyard and Mausoleum
In the cold, cold ground...
It's time to add more plots to the cemetery!

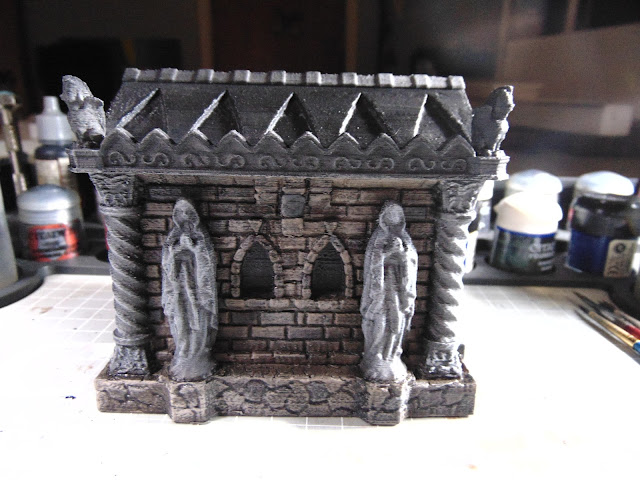
I finished up my first 3d printed piece, and to be honest I'm glad I'm done with it.  It was printed with an FDM printer, and I got it cheap on the Ebays.  Yet the texture really perplexed me.  There wasn't much I could do except just paint it.

Frostgrave Cemetery Setup 1
This would probably have been more awkward in the end.
Originally I had planned this as part of a full piece cemetery, but I decided to use all the constituent parts of that project and make it three separate ones:  Cemetery Gates, Cemetery Graves and now the Mausoleum finishes it up.

Frostgrave Cemetery Setup 2
You can't really see the FDM texture, but it's there...
It turns out these were the only pics I had of the piece in it's original printed form.

Frostgrave Mausoleum
After all the stonework is done.
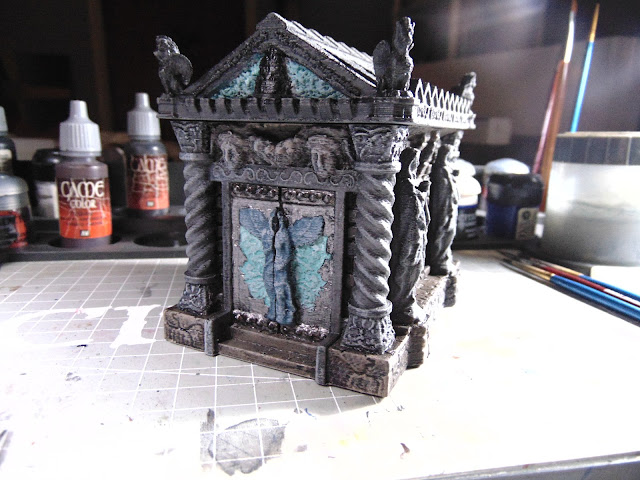
I painted these with the same stone patterns I used on the cemetery gates.  An unidentified drab brown, with some Scorched Brown and Mechanicus Standard Grey.  I had originally primed the entire piece with a flat grey that really matched GameColor Cold Grey, and all of the main fixtures are painted that color.

Frostgrave Mausoleum
Angle from the back.
After that, Secret Weapon Heavy Body Black over the whole thing.  I haven't been able to restock that yet, but I will definitely be hunting.  It's great stuff, for real.  I'm using it like it's going out of style.  I hope it doesn't.

Frostgrave Mausoleum
The entryway was especially challenging as the texture really bothered me.
For the decorum, I wanted to use Hexwraith Flame but the FLGS didn't have any.  I picked up some Nighthaunt Gloom, but ended up only using that on the Angel of Death on the front door.  For the rest of the fixture and inlays, I gave it some Nihilahk Oxide.

Frostgrave Mausoleum
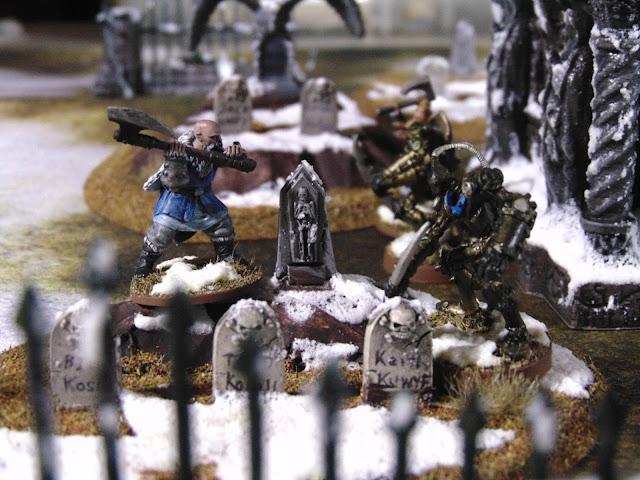
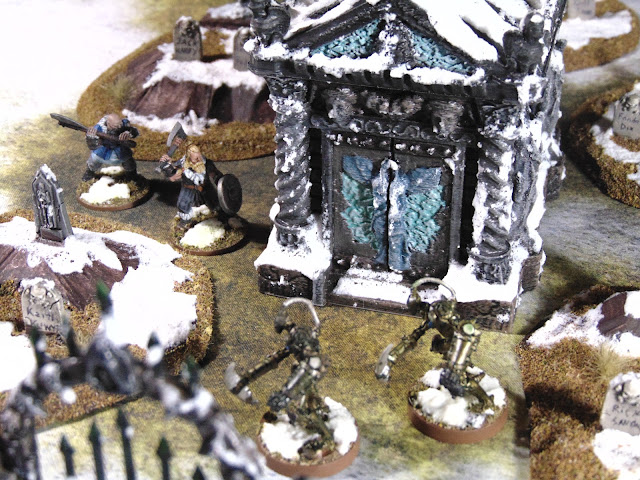
A barbarian fighting a robot in a cemetery.
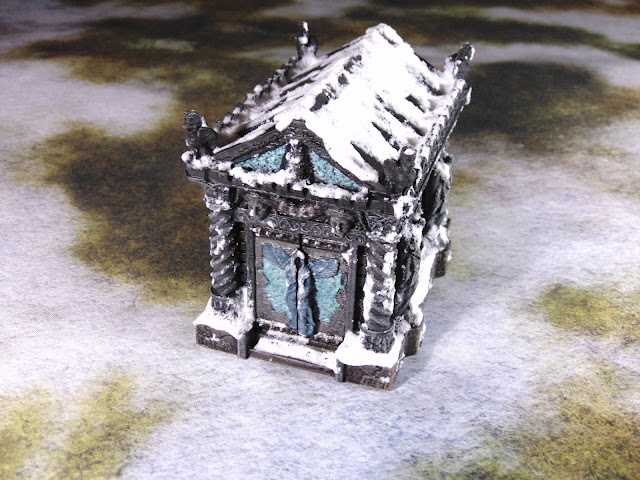
I was unsure about applying the snow, as I always am.  This is more of the Woodland Scenics Soft-Flake Snow mixed with pva glue.  Sometimes it doesn't dry like you want it to, and I haven't exactly mastered the mix ratios yet.  I think it turned out fine, but it doesn't have a base so there's no snow piling up around the foundation.  Maybe it's heated somehow from within...

Frostgrave Mausoleum
Another barbarian, fighting another robot, in another part of the cemetery.
The theme of these projects really comes out.  I think it looks good on the table with all the other pieces, but maybe not as flat and nice looking as the original layout suggested it might be.  On the other hand, all the pieces are modular and can be used in any fashion we can imagine.

Frostgrave Mausoleum
Softly, the snows came...
Now we've got some cool terrain options for Frostgrave.  On a 3'x3' table, this setup actually takes up a fair amount of space.  It can be spread out among the ruins for a wider effect, but I haven't made up my mind yet if I need to get more of the cemetery walls from Reaper.

I probably do...

Frostgrave Mausoleum

Friday, January 11, 2019

Star Wars: Edge of the Empire

GameDoc has started a Star Wars game for us here, and it looks like it's going to be a blast.  We're back around a real table, and I don't even hate the dice system. 

Star Wars: Mayhem, Inc. Campaign
Somewhere in the Outer Rim, things are about to get hotter than a worrt in the double suns.

Exposition

It is a time of great tension in the galaxy. The GALACTIC EMPIRE is embroiled in a civil war. In response to civil unrest, EMPEROR PALPATINE has disbanded the Imperial Senate and granted the regional governors, backed by military forces, control of their systems, along with leave to maintain order by any means necessary. The CORE WORLDS suffer the most. 

Meanwhile, the OUTER RIM of the galaxy remains only marginally under the control of the Empire. Local authorities, including gangsters and warlords, retain a great deal of power. Individuals may find more freedom and opportunity, but at much higher risk. On the desert planet of TATOOINE, one band of such fortune-seekers have run afoul of the HUTT CARTEL and now race to escape with their lives...
- GameDoc

Scum & Villainy

Rokka Reer and Kali Shakka are Twi'leks bound to the service of one particularly surly Hutt named Teemo.  While in Teemo's service, they meet the young doctor Xander Cruz.  Xander enlists the help of some surly, shady characters in order to hatch a plot:  free Kali and Rokka from Teemo's clutches.

Modo Phloid is a small time con-man and big time thief.  He's had enough of Teemo's blithering idiocy, and is looking for a leg up.  His partner is the 'reformed' murderbot B3-T5Y, affectionately known as 'Betsy'.  The two have a small reputation for larceny and skulduggery, but this time they needed more planning and muscle.  To that end, they have enlisted the help of their friend X, a devaronian immigrant to Tattooine who is also an accomplished survivalist and tracker.

Then came the day it was time to blow the joint and leave Teemo in the dust...

Current
  • Rokka Reer, Twi'lek Performer
  • X, Devaronian Scout
  • Kali Shakka, Twi'lek Mechanic
  • Xander Cruz, Twi'lek Doctor
  • B3-T5Y, Droid Heavy
  • Modo Phloid, Human Thief
Session Logs

Sunday, January 6, 2019

Iron Seer Campaigner

Increase confusion.
Inspirobot has a plan for your work day.
The Campaigner is back!

The newly revised section compiles all our current campaigns in one space for easy tracking.  It's now more of a forward-facing launch site for our players to get all they need from one stop without having to search through the archives.  The Wargames and RPG Portals will lead to all information relevant to game lines, but the Campaigner keeps everything up to date in an easy to parse format.

Previously, this section was another blog, but we really needed a better user interface for this information.  It's on Google Sites for the time being, but we'll probably be switching to a more robust display system in the future after I get around to re-jiggering some hi-def backgrounds.  It could take some time, though - I'm currently forging myself a new helmet.

So if you've got a hankering for games, check out the Campaigner section to see what's going on.  This is especially useful since our current campaign formats allow anyone to play for any side at any time, so don't feel bashful about asking to get into one.  That's what it's there for.  Whether you're into wargames or RPG's, all the info you need for each ongoing battle will be readily accessible from the Campaigner.

So marshal your forces and dig your pc's graves early.