Monday, October 29, 2018

Roll20 and the Inexorable March of Technology

Don't annoy your mind.
Inspirobot won't ever annoy you.
So, here's the deal.

We started Storm King's Thunder on a table...albeit a small one.  It wasn't long after we had moved into the new house and space was a premium.  At some point, we got the idea to use the TV on the wall to show some data using some camera and VOIP.  This allowed folks at home to join in, but eventually we moved the game to Roll20.

Everyone eventually decided to show up at the actual game to engage in camaraderie and intelligible conversation.  It was decided that we would be using Roll20 only if folks couldn't make it to the physical game location, and it was better.  At some point, I got the official stuff on Roll20 and subscribe monthly to get those cool light effects.

We have kept on using Roll20 up until this point.  Everyone comes to the spot, but they bring their laptops.  We have very little use for most of the analog items in my lair.

The main reason for continuing to use Roll20 is (I believe) I paid for it on Roll20 already.

Now I like some Roll20.  I think it's really neat.  I liked playing around with it, and it's a very useful tool for long distance gaming.  I think it would have been nice to have that when I was a kid.

I enjoyed building adventures in Roll20, but it's very time consuming...more so even than normal DM work.  Graphic design skills are really a necessity, or at least basic manipulation skills.  If you want it to look really nice that is.

I think I might like to run a full campaign online, where everyone has nice quiet lairs to retreat and enjoy the game.  However, I think I will enjoy having folks at my table better.  An ACTUAL table.  I think it's just a way cooler experience and is pretty much the entire point of the hobby.

Unless I can get all my out of state buddies nailed down for a game on Roll20, I'm definitely heading back to the table after Storm King's Thunder.  Until then, it's usefulness has really run it's course for me.  Frankly, I'll be happy to get back to my terrain collection and all those ridiculous figures I've managed to hoard over the years.

Sunday, October 28, 2018

Dark Age Jade Falcon

The Dark Age has begun.

The year is 3145, a century after the Clan invasion of the Inner Sphere...and all is in ruin.  As old wars grind away, new ones flare up.  The Clan Jade Falcon has mustered on Izar for a foray into Commonwealth space to expand the Falcon's Reach, and we begin our adventure here on the field as our Jade Falcon commander surveys their battleforce.

I decided to go ahead and take photos of the MechWarrior: Dark Age models I'll be using to start Horizon Wars and other mecha games.  I'll be adding squads and support elements later, as I've got plenty of C.A.V.s to paint up!

Dark Age Jade Falcon Army
Jade Falcon attack force, mustering on Izar.
2nd Falcon Dragoons
Commanding Officer Star Colonel Ayaan Mandaka

Strategic Mission: Take Planet Vindemiatrix from the weakling Lyran Commonwealth.

Dark Age Jade Falcon Artillery
A mix of stationary emplacements and mobile fire support.
Jade Falcon usually eschews such tactics as bombardments and artillery.  Nonetheless, the attack force does have some artillery support units.  These elements provide support to bust emplacements and dig out infantry from defended positions in coordination with a direct attack, rather than performing long-range bombardments.

Dark Age Jade Falcon Cavalry & Air Support
Allied Clan heavy transports aid in moving heavy equipment, while VTOL craft provide air support to the ground forces.
Light Cavalry and Aircraft carry a secondary value to the Jade Falcon, and as such these units are limited.  However, the Clan's tactics do not usually require them.  When they are deployed as part of the attack force, they fulfill the role of transport, reconnaissance and air-defense.

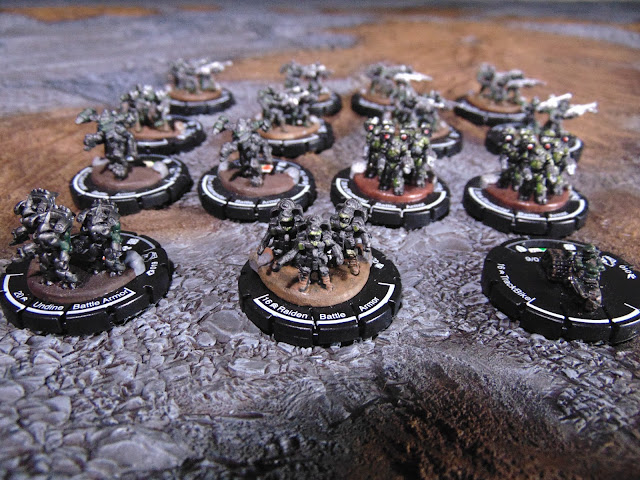
Dark Age Jade Falcon Infantry
Infantry Armor!  ...and a TrackBike!
A large section of Light Power Armor elements make up the bulk of the Clan infantry in this attack force.  These are augmented by a number of other models of armor, including some Elementals.  In addition, a TrackBike serves as Mobile Infantry reconnaissance.

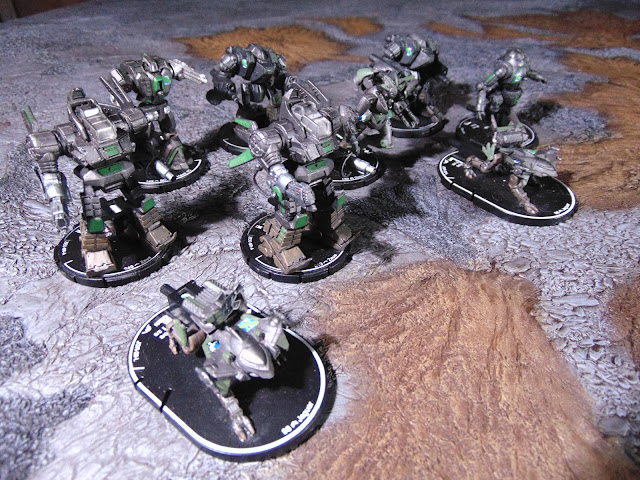
Dark Age Jade Falcon Battlemechs
Powerful Jade Falcon Battlemechs cross the Sulfur Fields.
The Clan has brought a selection of battlemechs to take part in the attack force.  Zeus, Blade and Jaguar mechs will be most common, supported by a few light and medium varieties.  Expect Clan Stars to be heavier than standard.

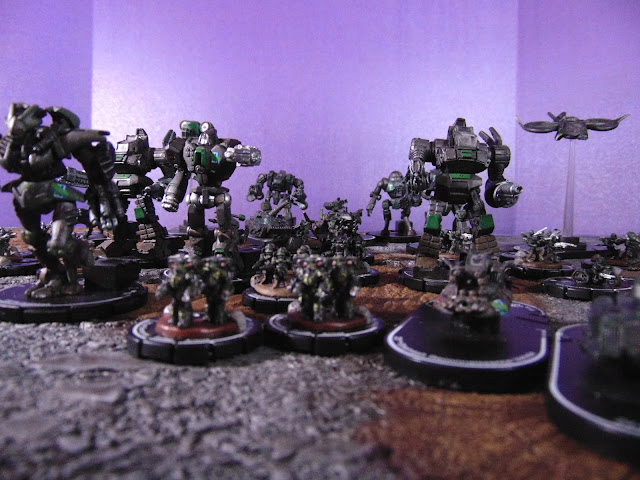
Dark Age Jade Falcon Army 2
For the glory of the Jade Falcon!

Sunday, October 21, 2018

Zuzzy Sulfur Fields 6'x4' Mat

Zuzzy Sulfur Fields Mat
Welcome to Planet Suck.
Several years ago, a member of our club bought a Zuzzy Mat when they were still available, the Sulfur Fields.  We played with it a lot but never actually painted it.  Today, I'm finally putting some color on it, despite years of trepidation.
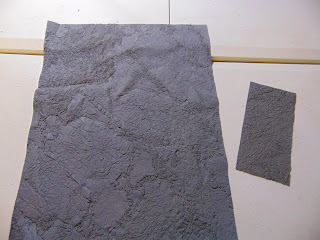
Zuzzy Sulfur Fields Test Mat and Strip
Test pieces, so you don't crump yourself.
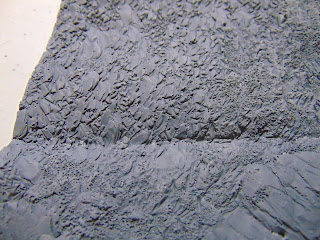
Zuzzy Sulfur Fields Test Mat Defect
Weird manufacturing defect / fold.

The mat came with a few samples we could use to try out paint schemes and get used to the material, though the larger one was severely warped and the smaller one had a crease.  I smashed them under books for a day but to no real avail.  At this point, I still hadn't pulled the larger mat out of storage, and began to grow anxious.
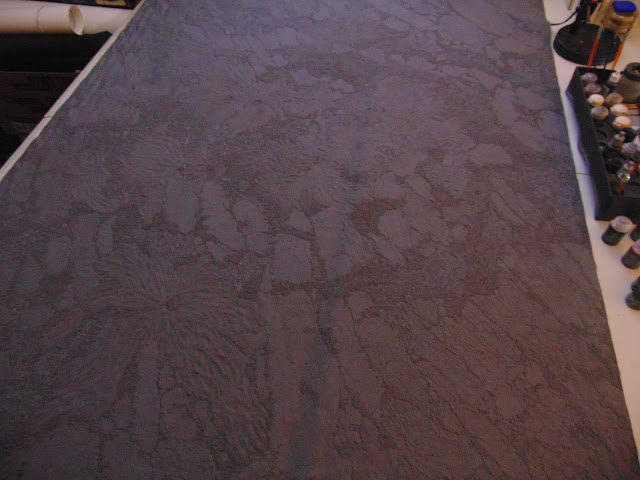
Zuzzy Sulfur Fields Mat Unpainted
It's bigger than it looks.
The larger mat actually stood up a lot better, but it wasn't warped in the first place. There was a little crinkling around the edges but it stood up pretty good.The mat is made of a pretty thin vinyl, and had a SOME crinkling on the edges, mostly due to storage.  It's been chilling for at least 6 years.  Though we tried to be kind to it, it's very thin and I had always been wary around it.

So the plan is - "scumble" each terrain feature independently, then drybrush each independently.  This will allow me to vary tones across the mat and yet normalize them in the end.  The idea is that this mat is supposed to represent a "grey world" or barren moon...or even some terrible part of the Badlands.
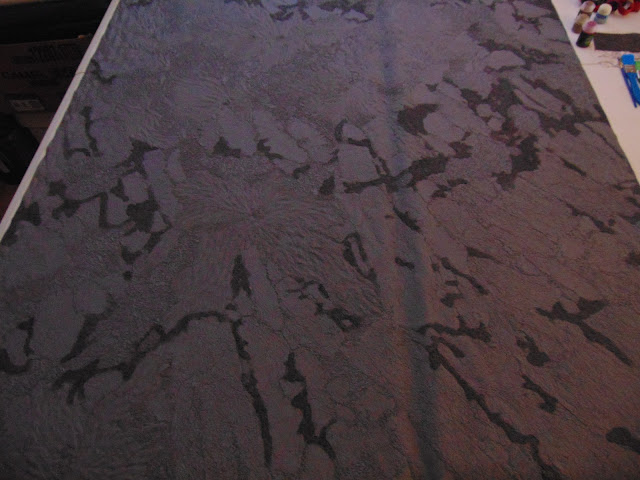
Zuzzy Sulfur Fields Mat Inking
That's an entire bottle of Nuln Oil.  A big one.
I bought some inks specifically for this project from the FLGS.  Agrax Earthshade for the exposed rock, with Nuln Oil for the mineral deposits.  Some Carroburg Crimson for the sediment around the fumaroles.  After the inks, I'll apply some grey drybrushing to even out the color.  To test, I applied it to one of the cuts they gave me.

Zuzzy Sulfur Fields Test Strip Painted
Agrax, Carroburg and some light drybrushing.
I liked the way the ink went on.  It looked a lot better than some other attempts at a Zuzzy I'd seen, right off the bat.  I wasn't entirely sure what textures to do what color, so I did the mineral deposits on this cut with both Nuln Oil and Carroburg Crimson.  The whole thing was kind of confusing...again just due to the sheer size.  I feel like if I had realized the actual number of textures (which aren't apparent from these samples) I could have made a better plot for the mat.

Yet, it was supposed to be an alien moon, so who cares?  The mineral deposit that was colored with Nuln Oil and highlighted with Astronomican Grey provided the sharpest contrast, so I went with that.  The entire time I worked on this project, I would remain unsure of myself on that decision.  I doubled down anyway.

Zuzzy Sulfur Fields Fumaroles
You gotta start somewhere, if you're not using a paint roller.
At first my thought was to do the mineral deposits all over the map.  There were basically four types of terrain on the mat - rock slabs, broken rocks, fumaroles and a set of some kind of mineral deposits.  Honestly, I couldn't make sense of things until I started painting the actual large mat.  Even looking at the pictures available online didn't give much guidance.

After I had run through a full bottle of Nuln Oil in about an hour and a half I realized I had grossly miscalculated the amount of ink this was going to take.  It was about this time I also realized how long it was going to take to paint like this.  The whole thing became pretty haphazard after this, just from the sheer size of the mat and the detail on it.  Honestly, tackling it by myself almost overwhelmed me.

I considered doing what everyone else with a Zuzzy has done up until this point - getting some cheap acrylic from the hobby store and a paint roller.  After looking at the sample I had painted though, there was something that said that same effect would not turn out with anything but the expensive inks.  It just wouldn't settle in those cracks like that, even though that filling in all that texture was what was using so much ink.

I decided to give it a shot and paint the next texture in sample size.  I found one of the smaller fumaroles (?) and dropped Carroburg Crimson on it to see how it looked.  I really liked how it came off on the sample, but this texture was different than that.  If it took too much ink or didn't look right, I'd be off to get some cheaper paint before I got too much further invested in it.

...and it didn't work.  The ink didn't settle right, so I went to my cabinet, got some acrylics, and replotted the whole project.

Now the project looked like this:
  • Mineral Deposits - red with black/brown wash
  • Sulfur Flows - red/brown with light highlight
  • Stone - black.brown wash and Light grey drybrush?
Right off the bat, the project time extended as the acrylics take a longer time to dry.  However, the price and annoyance to me went down drastically and I decided to go ahead with what I had.  A little while later, I said "don't worry, be happy" to myself and just started painting with acrylics, inks, and anything else I happened to have handy.  It started to go much quicker.

In practice, I saw I needed to do it section by section rather than feature by feature, due to physical limitations of my paint area.  So I decided to do it by halfs / quarters while I finished the colors and washes.  Drybrushing would be done all over at once.

Zuzzy Sulfur Fields Mat Textures
After the ink there were varying tones across the map.  The light grey drybrushing brought it all together.
It took an unbearably long time...several hours across many days to get something I was satisfied with despite the limited color palette.

Exploring the Surface of Zuzzy Sulfur Fields Mat
"Yo, droid.  Beer me."
It took several passes.  The greys of the stones were the biggest single section, though there was some variance in the tones of the inks underneath to give it a more natural feel.  The reds, browns and ochre of the fumaroles took comparatively little time.

Zuzzy Sulfur Fields Mat Stone Texture
All kinds of rocks and stuff.
Nice enough for outer space!  Giant rocks, broken ground and flowstone...

Zuzzy Sulfur Fields Mat Away Team
"It's ok.  We're from the holo-net."
The blending between the edges had me worried at first, with my obsession with clean lines.  However, this is dirt and stuff.  The scumbling and drybrushing created a nice blend effect with the kind of fuzzy edges you see in the space-yard.  Presumably.

Zuzzy Sulfur Fields Mat Fumaroles!
The fumaroles are dense near the center of the board, but are spread pretty evenly.
I wasn't truly sure of the colors of the fumaroles and sulfur flows until the very end.  It ended up looking a lot like the sample on the Zuzzy site, but far less busy.  Which is nice, since terrain will be stacked on it.
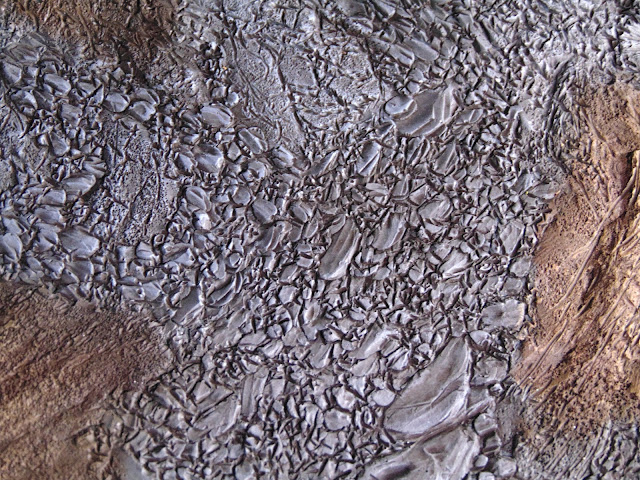
Zuzzy Sulfur Fields Mat Scree Texture
Check out the texture on that broken stone.  MMMMmmmm...
The final stage was to give it a light matte coat, to protect (allegedly) the work I've put in.  That acrylic can be vulnerable to moisture, but that's a concern around the table anyway.  Make sure to stick your beer in the correct receptacle when mining sulfur or iron on Planet Suck.

Zuzzy Sulfur Fields Mat Matte Coat
Watch out for the Double Bunghole, a notorious geyser system near the center of the board.
Zuzzy doesn't exist anymore.  I mean, the mat is really amazing, but it is kind of a monumental task to paint it in any fashion other than getting the paint rollers out.  Honestly, I didn't pay that much attention to detail and it still took quite some time to get finished the way I wanted it.  Yet, it's done, it looks awesome and now I'm going to populate it with cliffs, crags and industrial equipment!
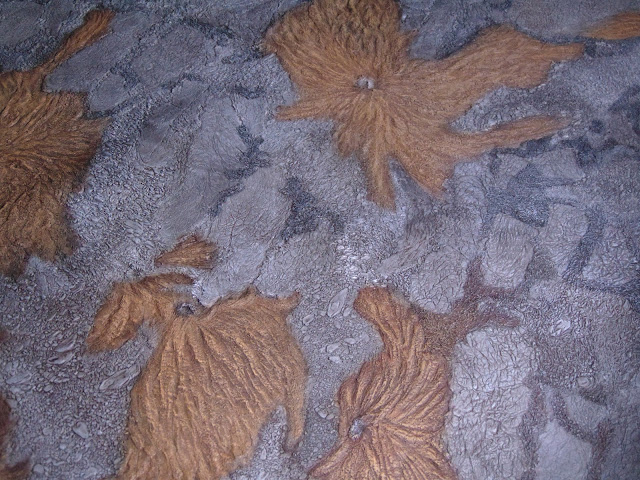
Zuzzy Sulfur Fields Mat Overview 2
"Dropship in the pipe.  Planetfall in 5...4...3..."

Sunday, October 14, 2018

Nether War: Shadowtop Cathedral

Dungeons & Dragons: The Nether War
Harpers live - and die - to keep the balance.
Nether Warriors!

The final battles are soon upon us.

Darkness will descend upon the Sword Coast if the dragon's plans are not stopped.  If they are allowed to consolidate power in this area of the world, they will find no shortage of recruits for their burgeoning armies.  Tribes of savage humanoids, Uthgardt and other marauders will swell the ranks of the Zhents and the Cult alike.

We are not alone!

The Harpers and Enclave have both gathered their finest troops to defend their Fortress.  We must stop them here, and strike at their heart before they overtake the Sword Coast.  Rally and go forth, brave defenders of freedom in the Realms! 

Tier 4 - Shadowtop Cathedral

Shadowtop Cathedral
Shadowtop Cathedral
The dark army has overpowered the forest's defenders and ploughed a trail to our Fortress.  We must assume treachery and fell sorcery to be at work.  The Emerald Enclave have invited the Harper's warriors to one of their most important meeting places, and the reinforcements have arrived none too soon...
  1. Scenario 1 - Shadowtop Canopy
    • D&D Attack Wing, 150 Legion Points
      • Setup: Standard.  No flying unit may attack any ground unit without landing, nor can they be attacked by ground units.
      • Objective: Destroy the Enemy Legion.
      • Resolution: When either player's last miniature is destroyed the battle is over.  The Evil player must have at least one Dragon on the board at the end of the game in order to claim victory.
  2. Scenario 2 - The Seer's Retreat
    • D&D Miniatures, 150 Point Skirmish
      • Misty Ruins
        • The Good player must spend at least 75 points to include an Emerald Enclave spellcaster and any number of beasts, animals or fey.
  3. Scenario 3 - The Emerald Grove
    • Standard D&D Attack Wing, 175 Legion Points
      • Setup:  Place an Objective Token in the center of the board.  Each player then places an Objective Token up to Range 1 of his own board edge.
      • Objective:  Control the most Objective Tokens at the end of the battle.  You Control an Objective Token if you are the only player with models within Range 1 of the Token.
      • Resolution:  The game ends at the end of any turn in which either player has incurred losses totaling 125 points or more.  Controlling your own Objective Token counts for 1 VP, the center token is worth 2 VP and your opponent's token is worth 3 VP.  The player with the highest VP count at the end of the game is the winner.
  4. Scenario 4 - The Gates of the Cathedral
    • D&D Miniatures, 200 Point Skirmish
      • Life Force
        • The Evil player must spend at least 40 points to include one or more Dragons.
  5. Scenario 5 - The Battle of Shadowtop Cathedral
    • D&D Attack Wing, 200 Legion Points
      • Setup: Standard.
      • Objective: Destroy the Enemy Legion.  
      • Resolution: When either player's last miniature is destroyed the battle is over.   The Evil player must have at least one Dragon on the table at the end of the game to claim victory.
When this base is cleared, the campaign is over and the Evil player has won!

Total Points Evil Victory Narratives
1 to 3 The Emerald Enclave and Harpers have been pushed out of their former territories, yet we are stretched thinly.
Soon, the Harpers will infiltrate our ranks, and the Enclave will seek vengeance, but we will be quite ready...
5 to 11 The Cult and the Zhentarim have managed to turn entire settlements over to our cause.
The Harper presence has been nearly eradicated, and the Enclave have no more strength to fight.
12-18 Much of the north has fallen sway to armies of Cultists and Zhentarim. A darkness descends upon the land...
The Morueme are pleased, and their foes are no threat for the time being.
19 to 26 The tide of terror unleashed by the Morueme is the stuff of legends.
Where no cult or Zhent banners rise, only plumes of smoke and fire mark once thriving settlements.
Now, new enemies will take the place of the old as they witness the horror in lands near their own.
27+ Such is the might of the emerging dragon kingdom that the borders of nations are redrawn.
The Morueme have become the undisputed rulers throughout these Realms, and rule by fear and terror alone.
The new darkness descending upon the land has no end in sight...

Sunday, October 7, 2018

Frostgrave: Cemetery Gates

Reaper Cemetery Walls & Gates
"...they said you could hear the Devil and the Lord, a-countin' out souls."
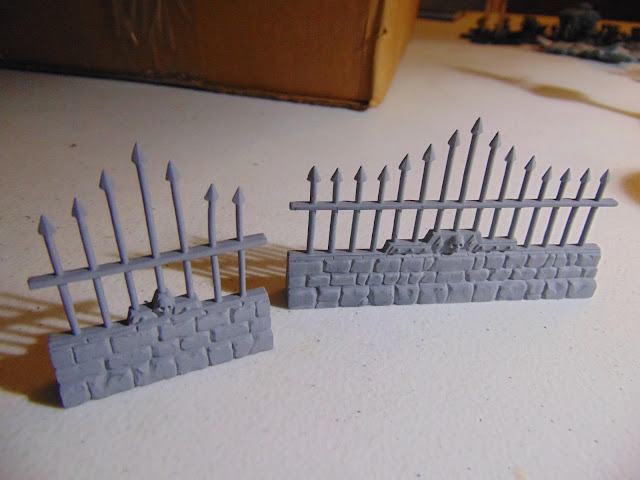
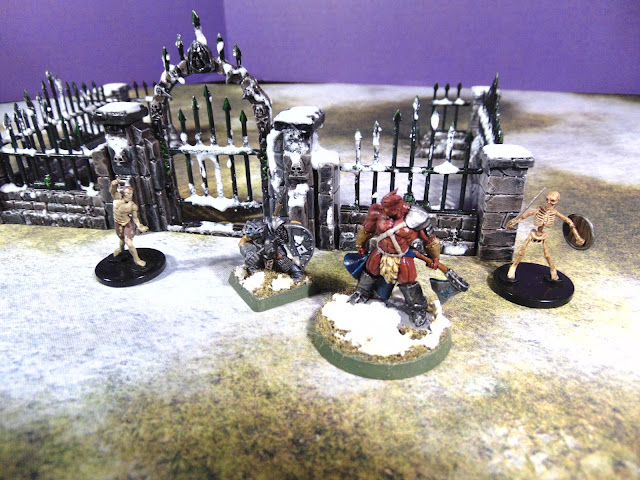
Well, I got Cemetery Fences & Walls from a Bones Kickstarter and I finally decided to paint it.  This is the first part of a larger cemetery set for Frostgrave.  Originally this was going to be a single set piece on one large base, but after considering it I felt that it would be cool to have a set piece but having everything loose and be able to do whatever you like with the setup.  I split the project in to basically three parts instead of one whole, each of which will be modular and specific to my Frostgrave board.  So, I figure you've got to set the fences up first.

Reaper Miniatures Cemetery Walls 2
A grey basecoat'll do'er.
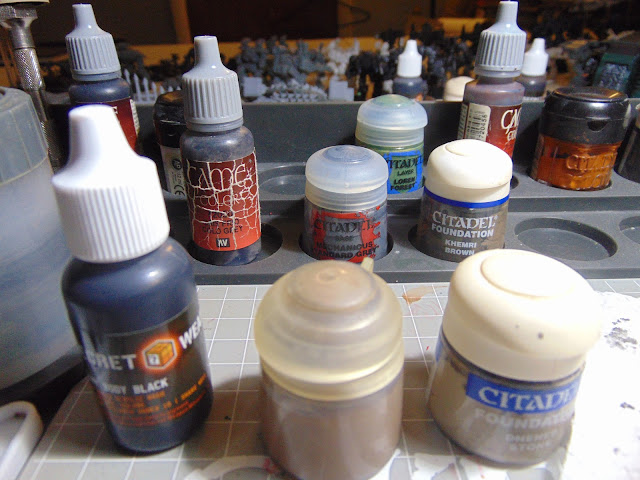
Dheneb Stone and something that looks like Dheneb Stone (it didn't have a label when I fished it out of the rack) make up the base color.  I think it IS Dheneb Stone, so I decided to try to use it up.

Rock Colored Paints
Eh, the shade is a bit off.
 On second thought, maybe that's not Dheneb Stone.

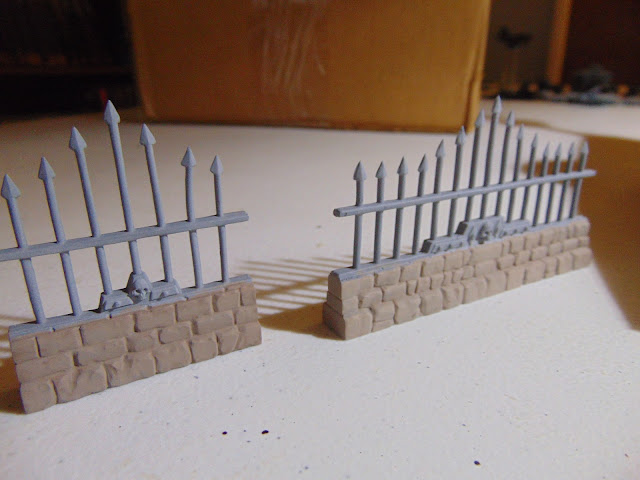
Reaper Miniatures Cemetery Walls 3
Dheneb(?) basecoating.
A full layer of the "stone color" down and I went about picking out individual stones with the greys and darker browns.  I did this while quite busy in real life, and somehow forgot to take pictures of the walls at this stage.  You'll be able to see the Game Color Charred Brown and Cold Grey that were used for the other colored stones in the pictures below.

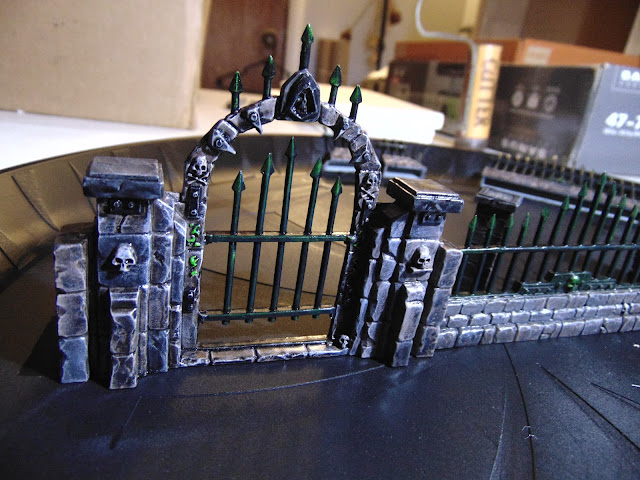
Reaper Bones Cemetery Gates
"Yep.  It's definitely made of ghost-iron.  Not a good sign, if you ask me...guv'na."
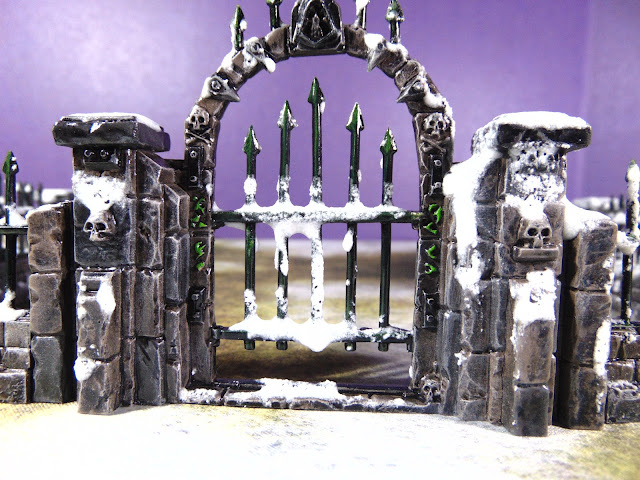
So, I inked it with the Heavy Body Black from Secret Weapon Miniatures.  Afterward, that was cleaned up with a drybrush of the 'stone' color we don't quite know the name of.  Rocks were looking great.

I used Game Color Black to put a base on the bars, and after that had to really think about how I wanted to paint these bars.  I definitely wanted some sort of sorcerous black iron, so that's how I painted it.  To create the 'ghost-iron' effect, just some drybrushing with some Orkhide and Scorpion greens.  I made sure to get the runes on the gate with this color as well.

It looked really nice at this point.  I messed up right at the end when I noticed the sealer I was using was gloss instead of matte.  Somehow I picked up the wrong can and failed to check.  The only thing that saved me is that it was going to a 'wet' table and wouldn't really be noticeable as out of place.

I'll always double check from now on.

Reaper Cemetery Gate and Walls in Winter
Softly come the snows...
 ...then it was time to apply the snow.

Reaper Cemetery Gate and Walls in Winter 1
Berry Blessedhammer and Softhands the Bounty Hunter find clues in the cemetery.
 Turned out pretty nice, if some slight imperfections.  Looks good on the table, overall I think.

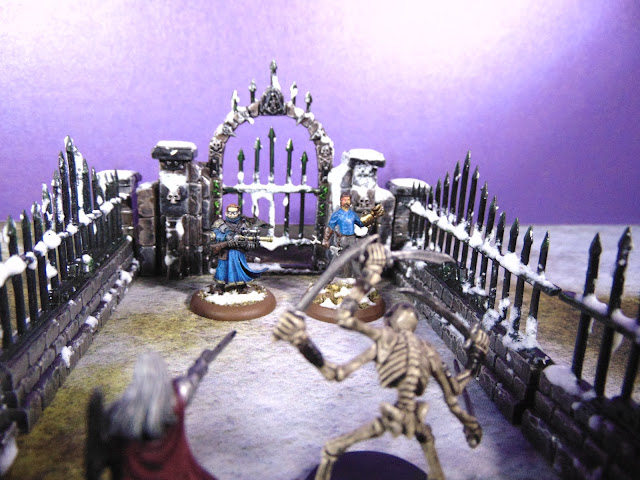
Reaper Cemetery Gate and Walls in Winter 2
"Damn.  We're in a tight spot."
 The set is kind of restrictive, but with two or more you could line out a fairly large plot.  As it is, we only intend for this to contain a few graves and a mausoleum.  More of these walls would be quite fun to play with, I must admit.

Reaper Cemetery Gate and Walls in Winter 4
"What's the dwarven word for 'shazbot'?"