Sunday, April 29, 2018

Frostgrave Low Ruins & Walls, Part 1: The Build

For quite some time now I've been gathering materials to do a lot of the projects I've got coming up.  It might not look like it, but I do have a specific plan for this blog.  One of the goals is to actually show off all the cool gaming stuff I've managed to collect in a way that will also help me remember that I did something.  Eventually,  I'll got through my back catalog of stuff and if I've still got it, I'll do a gallery for this site even if it was done for the old blog.  I might even keep some of my writing, since I've already done this for a lot of stuff.  Would be nice to get it all back in one spot.

For now, Frostgrave is on my brain.  So, until I swing back around to a game I've already really covered, we'll be focused on new projects for these sets.  Some of these galleries will be for a tiny project, some will be for sprawling and long-running endeavors.  Honestly, it's up to however I worked on them or thought about them in my brain.

Today's brain-thought:  Low Ruins and Walls for Frostgrave!

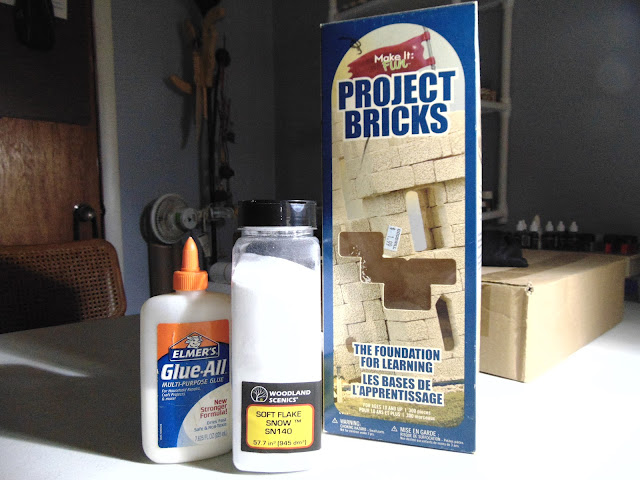
Frostgrave Ruins & Walls Basic Ingredients
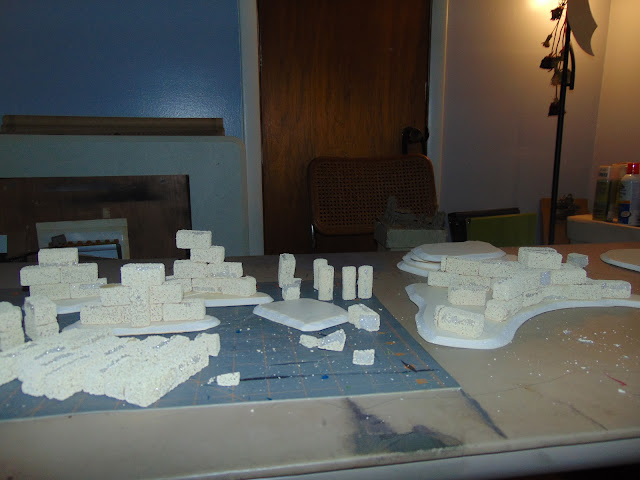
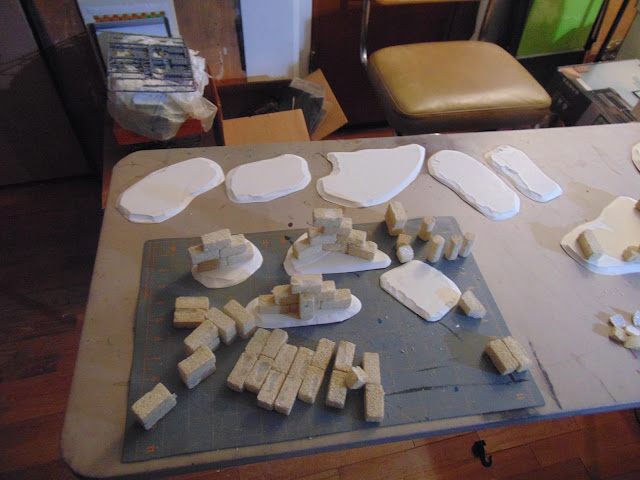
This is the bulk of the material I used.
Some fool had left these 'Project Bricks' in the club vault like four or five years ago.  When we moved, they were buried under the weight of stuff I hadn't unpacked yet, and late last year I uncovered them.  I didn't want to give them to my kids, because the stuff they are made of is very, very flaky styrofoam.  I didn't really see a use for them, at first.

After considering a Frostgrave terrain set for a long time, finally decided to give them a try.  However, unwilling to give them nice MDF bases I decided to cut up some foamcore, which historically sucks as a terrain basing medium.  These were also foam, though...and turns out, they are light enough that the foamcore worked great.

Shaping Project Bricks for Frostgrave Low Ruins & Walls
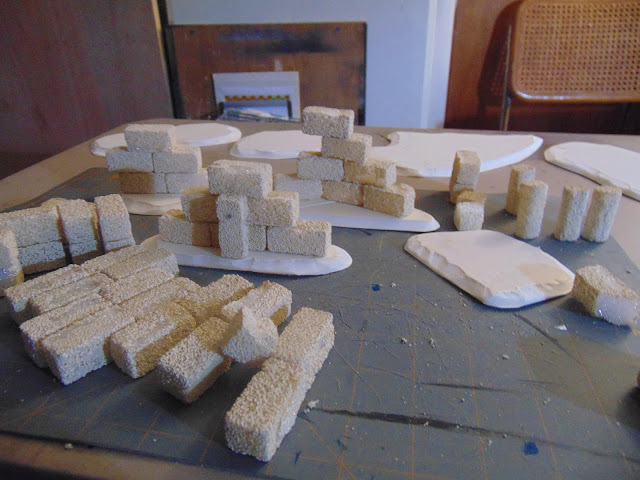
Cut 'em, roll 'em, stack 'em, glue 'em.
I originally had no plan and just cut random shapes out of the foamcore, then starting playing with them.  After a bit, I read the directions on the box and got the idea to roll them into columns and cut them to fit things.  However, I'm not an engineer and just managed some broken up walls.  Reminded me of some of the stone ruins from the turn of the last century where I grew up.

Construction Phase for Frostgrave Low Ruins & Walls
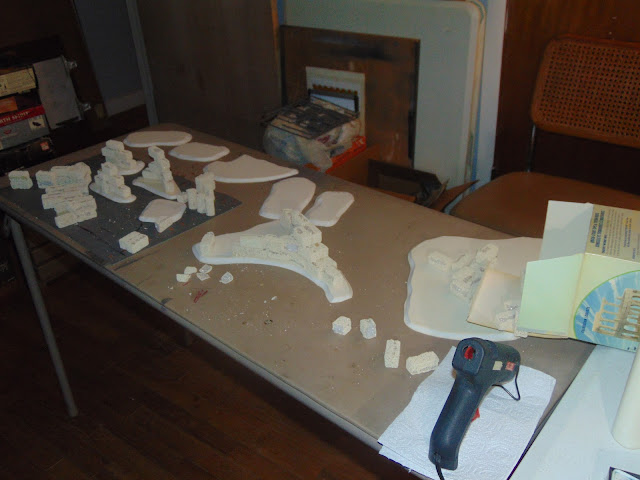
I decided that hot glue was unnecessary.
At first, I took a hot glue gun to work on this.  After attaching a few to the bases and working on several designs I decided that Elmer's white glue was fine.  Hot glue has it's place on the hobby table, but it was not here.

Small section construction for Frostgrave Low Ruins & Walls
First wall and scatter sections.
Space is a concern these days, so I have to limit all the stuff I can do for just one game system.  These ruins and walls will form the basis for this table, and it can be used for other games.  However, a lot of the scenarios in Frostgrave call for specific items.  I decided that even though I want to, I cannot do every piece, so some stand ins will have to suffice.

Constructing larger sections for Frostgrave Low Ruins & Walls
Some of these pieces I built during this stage actually will be used for set pieces and will feature elsewhere.
I started making smaller 'scatter' pieces that won't have bases.  These bricks are fairly large, so three bricks together can actually make a small dividing wall.  These can be used to create ad-hoc structures from many of the scenarios.  That said, I WILL be doing a lot of those scenario specific pieces, because I want to.
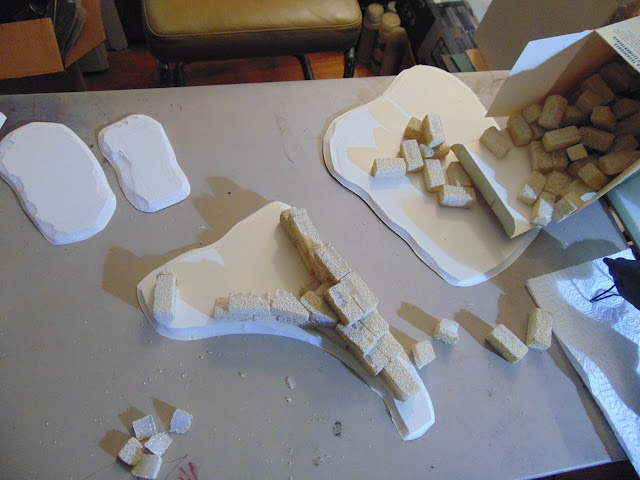
Foamcore bases for Frostgrave Low Ruins & Walls
Each base could be fairly large and surprising supported larger structures due to the bricks being made of foam.
I ended up making a lot of scatter pieces, in two different shapes.

Hardening the Frostgrave Low Ruins & Walls
Glue bath.
Now as I said, these were kinda flaky, but I use a lot of normal styrofoam.  Giving the entire thing a bath in white glue strengthened it.  This makes it harder, heavier and able to stand up to whatever chemicals I want to spray it with.  In this case, it also cured the flakiness, but...

Glue Applicator Brush
It was very sharp.
Despite being flaky, it was also very, very sandpaper like in texture and I destroyed an entire set of sponge brushes applying the white glue to the structures.

Frostgrave Low Ruins & Walls after priming and flocking.
After priming and flocking...
Now that it was shielded from the harmful effects of being spray painted, the styrofoam went under a few coats of paint.  A hunter green was applied to the base section, and over that a dark grey was used on the walls themselves.  This created a neat 'algae' effect at the bottom of the walls, and that's a cool technique I may work with in the future.

Frostgrave Low Ruins & Walls on a larger base.
This larger piece actually graduated to another project at this point.
I blended together a flock base from GF9 products, mostly Green flock...but also some other scraps that were in the bin.  There was some sand, some static grass and a few different grades and colors of flock from other projects I wanted to get rid of, so I used this somewhat random mixture to put down the base layer for the ruins.  We're getting there, but not done yet.

Now we have to match the pieces to the GF9 mat we're going to use.

Time to apply the snow to the ruins & walls.
Softly, the snows came...
I wasn't too worried about flocking coverage at this point, because now it's time to use the soft-flake snow.  I had tried to learn a lot about it before using it, and I felt confident going in.  This is an interesting material to attempt to use for the purposes of a wargame, but after it dries it's quite hard.

Woodland Scenics Soft-Flake Snow
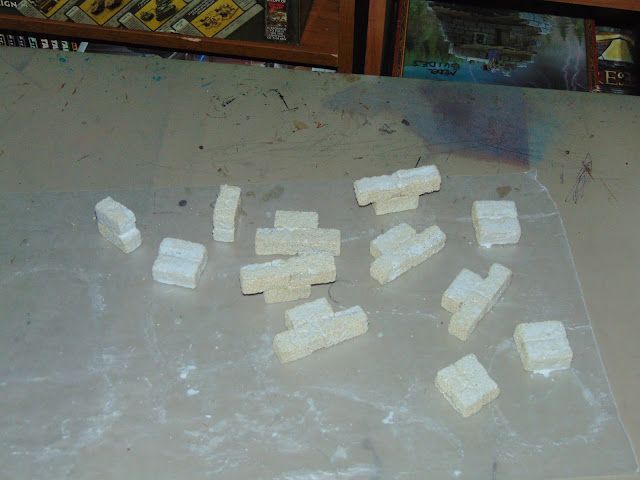
Soft-flake snow, improperly mixed and drying on a wax-paper sheet.
My first attempt at the snow was waaaay too thick.  I didn't know how to handle it, so I put a little bit on a wax paper sheet and tried to mix it up.  It dried very quickly.  I then got out a glass bowl and mixed much, much more together until I had a rather soupy goop that could then be applied to the ruins.

Frostgrave Ruins with more Snow
It was pretty slow going until I figured it out.
Eventually I got the hang of it and could apply the snow pretty easily.  However, it does take on the color of the flock underneath as it dries, so in some cases I had to apply snow on two separate occasions to take out the 'green tone' that had bled into the snow.  I'm guessing it's the dye on the flock leaching into the liquid glue, but I'm not a scientist.

Frostgrave Low Ruins & Walls Snow application, first pass.
The snow on the tundra is melting...IT'S MELTINGGGGgggg....
The soft-flake snow is something you kinda need to work with.  You can watch videos all day long, read articles about it,  or generally prepare to use it but it's still a very strange material unlike many others you may use.  For myself, I have only recently started working with fancy model products like this.
Frostgrave Low Ruins & Walls & Snowdrifts.
If you look closely, you can see the beginnings of Woodland Scenics Water Effects icicles.
Twenty-five odd years ago, this stuff wasn't all that common, and wargaming was kinda hard on terrain.  Now I'm more willing to experiment with new stuff, as I have time and wherewithal.  I suggest starting with something cheap, like styrofoam bricks and foamcore.

Check out the gallery in Part 2?

Sunday, April 22, 2018

Rogue Planet

You guys notice that a lot of things are named "Rogue" something these days?  I don't think it's because of Rogue One.  I think it's because of Rogue Trader.

Rogue Planet by Brent Spivey
Hitch a ride on the Rogue Planet as it flies by....
In the last few years a number of games have included that word in the title, such as Rogue Stars, which I have posted about recently.  Rogue Planet is another such title, with the word included to hearken back to the wild, wild wargames of Rogue Trader.  As such, both these games are pretty much setting agnostic, and you can field pretty much any force of models you like.

I got a printed copy from Wargames Vault, but there's not much to the book itself.  A mere 24 pages, it's definitely worth the time you'll spend reading it.  With only a few simple illustrations within, there's a surprising amount of content.  Along with a few really neat mechanics in there, and plenty of room for pretty much any conflict you want to have..  I haven't put this on the table yet, but soon...

Some of it is a little problematic, but for me the biggest gap is the measuring system for FX.  Basically, you use three fingers to create a 'standard' measurement...even though there is no way that is standard.  It's also unclear how exactly you measure...these things.  Is it within a standard measurement or...?  For clarity and standardization, we're just going to use a number for the standard measurement.  It's unclear what that should be, honestly, as no other indicators of intent are given but in the FX section.  If we are going to say that a standard measurement is, say, 2"...then that means maximum FX range is 6".  Seems a little...short.  Perhaps 3", for a max FX range of 9"?

How do you measure a Rogue Planet Standard measurement?
No one wants to look at my fingers every time we have to measure 2".
In practice, it seems like you're supposed to move it from one side to the other, a la 3" move.  We'll go with that, since otherwise my extra long index finger will get in the way EVERY TIME.  I'll be using my normal measuring tools with a standard increment, thanks.  Inventive, but no.

The test system is a little basic:  2d6, target number 7+; apply modifiers for different levels of success.  However, I really like how units are compared and profiled, and I can see it used for a variety of things.  I may or may not collect forces that are specifically for Rogue Planet, but right now I'm definitely using it for both Star Wars and D&D (yes, fam...fantasy only is ok) tabletop battles.  Really, it can do whatever you want.

One thing about tests is you're supposed to stop counting once you reach +3 or -3, but that's silly.  The way it's worded you could just read off the bonuses first and stop.  Of course, determine the total modifier every time and simply apply it as + or -3 if it would be greater.  Yes, this has to be said up front.

In all, it will be a welcome addition to pretty much any campaign.  The concepts here are similar to those that are gaining popularity across the wargames spectrum, so it will be easier to introduce some concepts with 24 pages instead of hundreds, as in the case of Tomorrow's War.  I'm especially looking forward to using it for D&D miniatures, because no one expects you to do that.

Sunday, April 15, 2018

The Nether War

The Nether Mountains

Situated near the Sword Coast, the Nether Mountains have long been haven for dark forces.  It is the legendary home of the Morueme dragon-clutch, and many clans of savage humanoids that pay them homage.  It is perhaps no wonder that it is now the site of much conflict, as the outer world presses in upon the domain of the dragons.

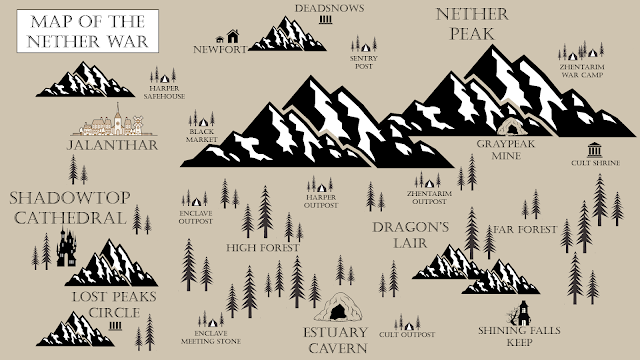
D&D Nether War Base Map
Base Campaign Map
The Nether War

From Shadowtop Cathedral all the way to Nether Peak on the eastern side of the mountains, an ominous gloom has fallen across the land.  The dragons and their minions are on the move, and they have even formed alliances with dragons from across Faerun.  Now, they marshal their armies and prepare to lay waste the domain of the Free Folk.

The targets of the dragon's march from Nether Peak will be Jalanthar and several other communities, including Newfort.  Most importantly, the dragons must rid themselves of the troublesome presence of goodly folk of the Emerald Enclave at Shadowtop Cathedral.  Once these marks of civilization have been cast down and burned to ash, a new kingdom ruled by dragons shall emerge.

The Cult of the Dragon is at the forefront of this operation.  The cult's agents sought out the most wicked of dragons across the land to deliver a message - join in the Morueme's conquest in the north and share in the spoils.  Of course not all the agents returned successful (or at all) from entreating with the evil dragons, but a great many of those dragons (and other fantastic beasts) have arrived to take part in the promised slaughter.

The Zhentarim, for their part, have been skeptical but remain willing to help.  In exchange for pittances from the dragon's substantial hoard, they have deployed agents and mercenaries all around the countryside.  When the war horns sound, they will be ready to assist the forces of the dragons.  As always, the Zhentarim hope to profit in the new 'political' landscape.

The Harpers, ever with their ears to the ground, have been following the developing preparedness of the Zhentarim with alarm.  Eventually their agents traced the activity back to the plans of a red dragon who was not known to be active in the area, and exposed the Cult's operations.  Quickly as they could, the Harpers marshalled together what forces they could. Knowing that Shadowtop Cathedral would be the ultimate target of the incursion, the Harpers marched to aid the Emerald Enclave.

The Emerald Enclave has been preparing for this war for some time.  They knew the signs, and had watched the dragons for many long years.  Once the Zhentarim began to mobilize, they knew the time was nigh.  War is near, and the Enclave stands far more ready than most.


Iron Seer D&D
You've met with a terrible fate, haven't  you?
Campaign Rules

The campaign map shows several bases the various factions control throughout the Nether Mountain region.  The ultimate goal of the campaign is to destroy all the opposing faction's bases while maintaining control of your own.  Each of the two opposing sides have eleven bases to begin with, and the first side to lose all their bases to their opponent's attacks lose the campaign.

Campaign play proceeds in a set of turns.  Each campaign turn, the players on each team decide where on the enemy map they will attack next.  Each specific base has it's own rules on which games will be played and the specific scenario.  If the attacker wins, that scenario is considered cleared.  Once all the scenarios associated with a base have been cleared by an attack, that base is destroyed.  The scenarios on each base must be played in numbered order.

An attack is considered 'in progress' until the attacker is halted by the defender.  Therefore, you can clear a base in a single attack if you win all the scenarios and 'clear' it.  Once all games associated with the campaign turn's attacks, a new campaign turn will begin.

The bases themselves are ordered into tiers.  All bases on the lower tiers must be cleared before an attack may be declared on a higher tier.  Each scenario will be fully described in further sections, and will be linked below when updates are made.


Evil Forces of the Zhentarim and the Cult of the Dragon

Tier 1 - Outposts
Tier 4 - Fortress
Goodly Folk of the Emerald Enclave and the Harpers

Tier 4 - Fortress

The campaign will make use of several different rulesets, each of which will be laid out in the scenario.  D&D Attack Wing and the D&D Miniatures Handbook (3rd Edition) will be used as the basis for many of the battles.  However, several different rulesets could be used by enterprising hobbyists such as Battlesystem Skirmish for AD&D 2nd Edition (we'll get there) or perhaps using Kings of War for mass battles.  Any additions to this list made during development will be updated here.

Battles begin 6/10/2018, so prepare your forces for battle.  Join the Zhents, the Cult, the Enclave or the Harpers.  Stats and release information on Wizards of the Coast miniatures can be found at this site, but we will be using similarly equipped models from our massive collection as stand-ins for certain models.  Furthermore, the use of the combat grid will not be used for Miniatures Skirmish when using the D&D Miniatures Handbook, and the game will instead be treated as a normal miniature battle game.

Campaign Scoring

At the end of the campaign, determine the amount of remaining bases the victorious faction has.  Count any base if it is not cleared by the enemy.  Find the Campaign Narrative level from this score, and then compare it to the Victory tables on the Fortress scenarios.  We'll then have a narrative to start our next Sword Coast campaign in!
  • Outposts are 4 Campaign Points each.
  • Bastions are 3 Campaign Points each.
  • Strongholds are 2 Campaign Points each.
  • The Fortress is worth 1 Campaign Point.
Total Points Campaign Narrative
1 to 3 Narrow Victory...
5 to 11 Victory!
12-18 Total Victory!
19 to 26 Heroic Victory!
27+ Victorious Domination!

Sunday, April 8, 2018

Horizon Wars

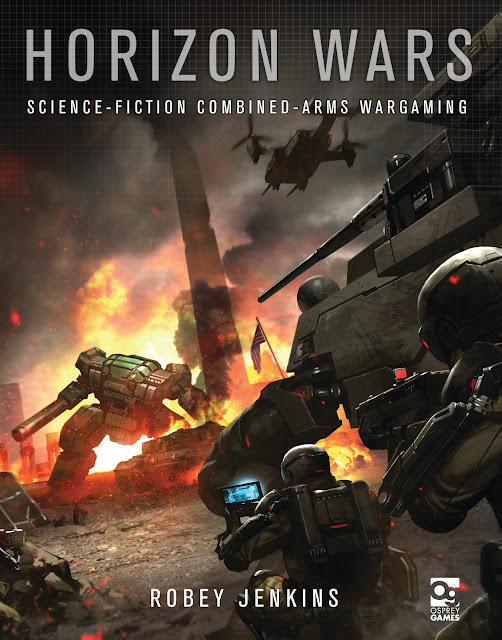
Horizon Wars Cover by Osprey Games
Buy Horizon Wars right here, right now!
Osprey Wargames, man.  I have to admit I think they've been my favorite publisher for the last 7 years or so.  I actually saw a few of their books at one of the biggest FLGS in the state recently, and I'm happy the wargames community explored other things after the...fallout of edition changes.

I like just about everything they do, certainly everything I've read.  While they may not be perfect (cost of naginatas in Ronin makes no sense), each one of them is cool in it's own right.  There is a staggering variety, pretty much something for everyone and new stuff coming out every day.

A lot of folks don't know about Horizon Wars, and that's a shame.  It's a combined arms wargame centered around mecha, and as far as it goes this is a steal.  It's a great game, and it will be the next game I jump on for campaigning, modelling and terrain building.  It's time to smash giant robots together, and fly around with helicopters and stuff.

One of the cool things about a lot of the Osprey Games is that many of them are somewhat setting and scale agnostic.  I'm going in with 10mm, an odd scale...but it's gaining traction with a lot of gamers.  I'm going to use Horizon Wars to play miniature games with the Battletech setting, during the Dark Age.  I'm not going to limit myself to purely Battletech models, either...since it's 10mm, I've got some Mechwarrior: Dark Age models to start with.  However, I've also got a lot of Reaper C.A.V. models, some generic WW2 infantry who's name and manufacturer escape me at the moment, and I'm going to pick up some stuff from other 10mm ranges like Firestorm Planetfall (defunct or not, I'm not quite sure) and Dropzone Commander.

Horizon Wars also uses the oft-shunned D12 in the basic mechanic.  I'll have to buy some extras just for this game, because believe it or not I just don't have that many.  Not very many games make heavy use of them except perhaps RPG's, and then not so much.  The very first die I ever owned I found in a ditch in Kansas, and it was a D12...one of the old, old ones you had to color in.  I assume it was in a bar ditch because no one likes D12's.  I still have that die, 26 years later.  Somewhere...I think it's in the big bag of old dice my daughters play with.  I should look for that to make sure I'm not lying.

I've decided that 10mm terrain can probably fill in at 6mm as well, especially with generic things like roads, monorails and nondescript buildings.  We're going in on a moon base table this time, because why shouldn't gravity and vacuum not be represented in our games?  We're all about being inclusive, so maybe your pilot will suffocate, be nuked alive by un-shielded radiation or maybe just float away into space after an explosion.  I'm still looking for good moon bases at 10mm, so if you know where I can find some drop a line in the comments.

FYI - I found three copies of Horizon Wars at a Half-Price Books in Oklahoma City a few weeks back.  Next time I run across something like this I'll make sure to pick them up.  I bet a couple of you guys out there would be interested in this, so take a look and see if it passes the bar.  The flexible force design rules should be enough to coerce you into a game.

...and to anyone who asks the asinine question:

"If you wanna play Battletech bruh why don't you just play Battletech?  You just talked about it anyway??"

To that, I can only say I never said I wasn't playing Classic Battletech.  Or Alpha Strike.  I love me some old school FASA boxed sets too.  In fact, I was once a total FASA fanboi.  I even love Renegade Legion, and most BT guys I know don't have any idea what that even was.  Shadowrun was the first RPG I ever bought myself, and I ordered Earthdawn 1st Edition so long ago that the mail carriers couldn't find my house and I had to have it delivered 45 miles away.  Don't sass my BT cred.

Horizon Wars might seem like it's limited, but it's actually very flexible in the sort of games you can play.  I might even throw the ol' RL grav tanks on the field and see how they play in the ruleset.  There are several semi-official(?) expansions written by the author, such as BioWar, DataWar, MetaFormers and more.  Check out the Facebook group here and dig the massive Files section, where folks have shared their translations of other game worlds such as Robotech, Planetfall and Infinity.

Check out Precinct Omega's Horizon Wars section.  It is the author's website, and you can find a lot of related materials.  Check out some of the other projects there as well for extra internet points.

So I guess what I mean to say is:  Get your robot runnin'.  Head out to the moon base.  Look for a heat signature in every game you play.  Yes comrade we will make it happen, take the foe in a death embrace.  Fire all your guns at once, and explode your heat gauge.
Sunday, April 1, 2018

Random Deathwind Corridor Missions

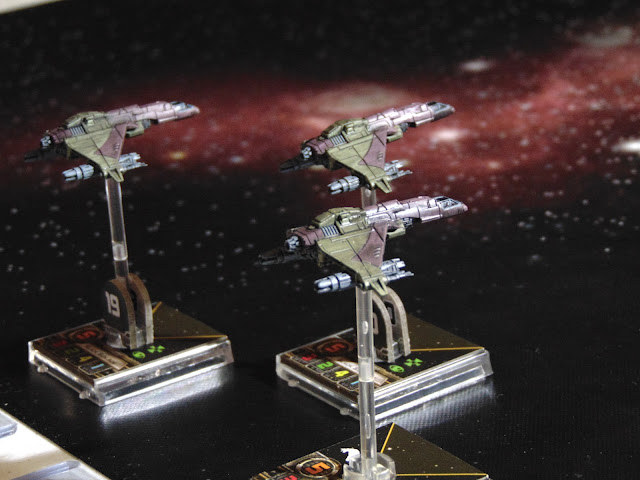
Kihraxz Attack Squadron!
Heavily armed and highly organized coalitions of mercenaries and pirates roam Deathwind Corridor.
We've been playing a lot of the standard scenario, and it's been brought to my attention that we need more missions for the campaign / general play.  Our group generally has always enjoyed the dynamic that the forces are built before the scenario determined, but in X-Wing that's not the practice.  You might not think it would, but it's actually kept us from playing a lot of the missions as part of campaign play.  This post will set up the framework we will use going forward for choosing missions to make for a more chaotic, interesting campaign.

First, let's talk about terminology.  Besides the places in the galaxy they refer to, Deathwind Corridor and the Cloak of the Sith have specific meaning to us.  Herein, the term 'Deathwind Corridor' refers to the general metagame we have created.  You might see this as the background setting for most of the campaigns we are going to run in the Star Wars galaxy across several rulesets.  Though we may bounce around the galaxy, the Deathwind Corridor will always be our pirate hidey-hole.  The 'Cloak of the Sith' refers to the title of the current, ongoing campaign.

Mission Procedure (X-Wing 1e)
  1. Select Game Size
    • Squadron Size 100-300 for Standard games.
    • Squadron Size 300-500 for Epic games.
  2. Determine Scenario
    • Mission
      • Any mission can be agreed upon and played.
    • Random Mission
      • 100 point squadrons can dice for scenario; see below. 
    • Sortie (Standard Game)
      • Any non-mission game 100-300 points in squadron size.
    • Epic
      • A Standard mission with Epic ships 300-500 points in squadron size.
The players can choose any type of scenario they like, or they can roll a random mission from the table below.  These missions are most usable with generic, 100 point squadrons with no other squadron restrictions than normal.  If any issues arise, this post will be updated to reflect any modifications with the mission selection.

Squadrons can be selected at any point during the mission selection / setup phases, though both players should be done around the same time.  Many squadrons are formed beforehand, and that's fine.  It doesn't really matter, with our metagame.

Random Mission Lists
We have lots of dice, so we can use a D12.
  1. Mission 1: Political Escort
  2. Mission 2: Asteroid Run
  3. Mission 3: Dark Whispers
  4. Mission 4: Den of Thieves
  5. Mission 5: Preystalker
  6. Mission 6: Undeniable Assets (Lambda-class Shuttle Expansion Pack)
  7. Mission 7: Cutting the Cord
  8. Mission 9: Jump To Subspace
  9. Mission 17: Disable the Relays  (Imperial Veterans Expansion Pack)
  10. Mission 18m: Outer Rim Raid
  11. Mission 20: Patrol Ambush  (U-wing Expansion Pack)
  12. Mission F1: Ambush
All of this is just for starters.  Eventually we will provide variants for Epic ships, and maybe even complications for Standard Sorties to shake it up.  Get out there and shoot down the enemy!