For quite some time now I've been gathering materials to do a lot of the projects I've got coming up. It might not look like it, but I do have a specific plan for this blog. One of the goals is to actually show off all the cool gaming stuff I've managed to collect in a way that will also help me remember that I did something. Eventually, I'll got through my back catalog of stuff and if I've still got it, I'll do a gallery for this site even if it was done for the old blog. I might even keep some of my writing, since I've already done this for a lot of stuff. Would be nice to get it all back in one spot.
For now, Frostgrave is on my brain. So, until I swing back around to a game I've already really covered, we'll be focused on new projects for these sets. Some of these galleries will be for a tiny project, some will be for sprawling and long-running endeavors. Honestly, it's up to however I worked on them or thought about them in my brain.
Today's brain-thought: Low Ruins and Walls for Frostgrave!
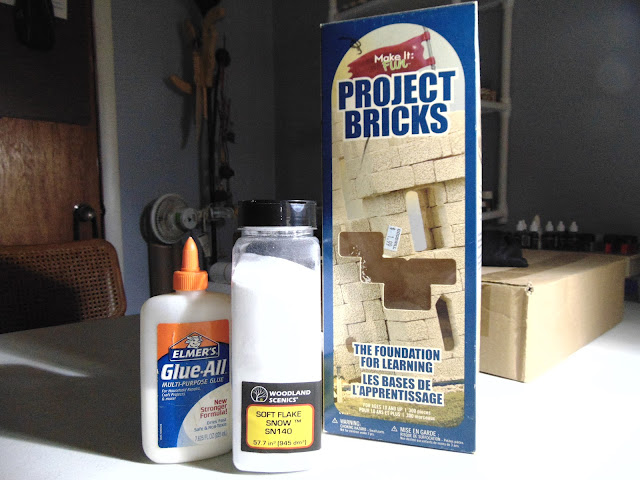 |
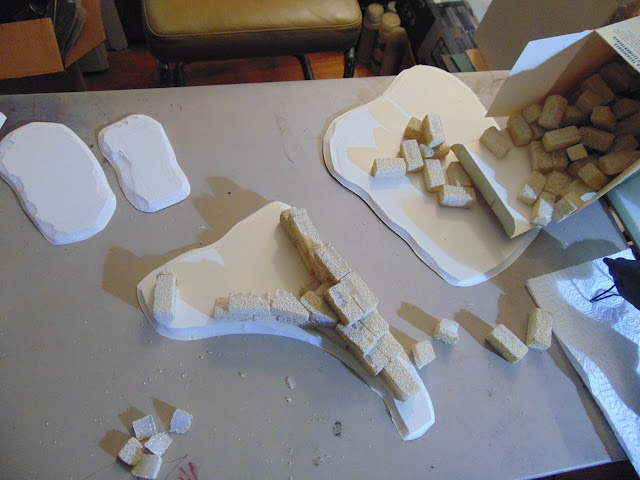
| This is the bulk of the material I used. |
Some fool had left these 'Project Bricks' in the club vault like four or five years ago. When we moved, they were buried under the weight of stuff I hadn't unpacked yet, and late last year I uncovered them. I didn't want to give them to my kids, because the stuff they are made of is very, very flaky styrofoam. I didn't really see a use for them, at first.
After considering a Frostgrave terrain set for a long time, finally decided to give them a try. However, unwilling to give them nice MDF bases I decided to cut up some foamcore, which historically sucks as a terrain basing medium. These were also foam, though...and turns out, they are light enough that the foamcore worked great.
 |
| Cut 'em, roll 'em, stack 'em, glue 'em. |
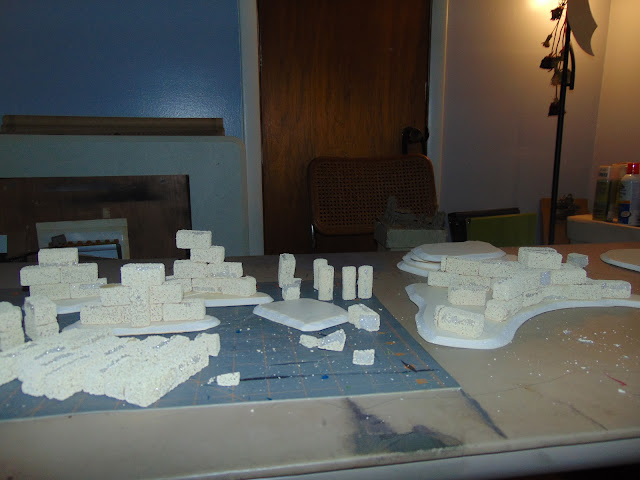
I originally had no plan and just cut random shapes out of the foamcore, then starting playing with them. After a bit, I read the directions on the box and got the idea to roll them into columns and cut them to fit things. However, I'm not an engineer and just managed some broken up walls. Reminded me of some of the stone ruins from the turn of the last century where I grew up.
 |
| I decided that hot glue was unnecessary. |
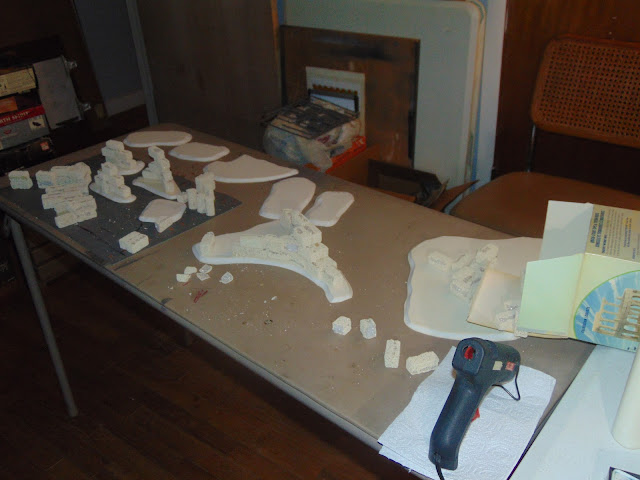
At first, I took a hot glue gun to work on this. After attaching a few to the bases and working on several designs I decided that Elmer's white glue was fine. Hot glue has it's place on the hobby table, but it was not here.
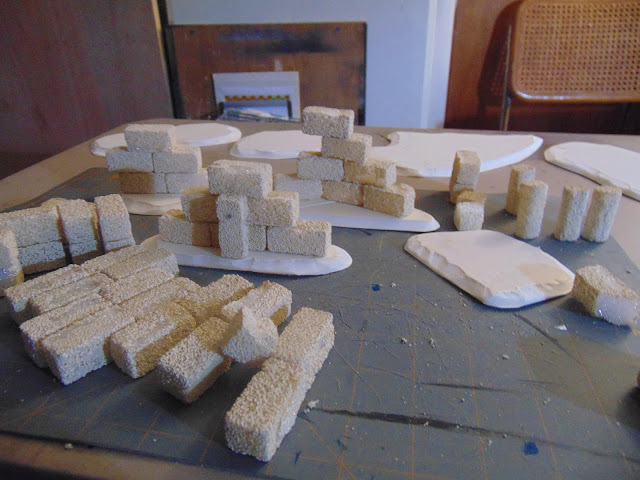 |
| First wall and scatter sections. |
Space is a concern these days, so I have to limit all the stuff I can do for just one game system. These ruins and walls will form the basis for this table, and it can be used for other games. However, a lot of the scenarios in Frostgrave call for specific items. I decided that even though I want to, I cannot do every piece, so some stand ins will have to suffice.
 |
| Some of these pieces I built during this stage actually will be used for set pieces and will feature elsewhere. |
I started making smaller 'scatter' pieces that won't have bases. These bricks are fairly large, so three bricks together can actually make a small dividing wall. These can be used to create ad-hoc structures from many of the scenarios. That said, I WILL be doing a lot of those scenario specific pieces, because I want to.
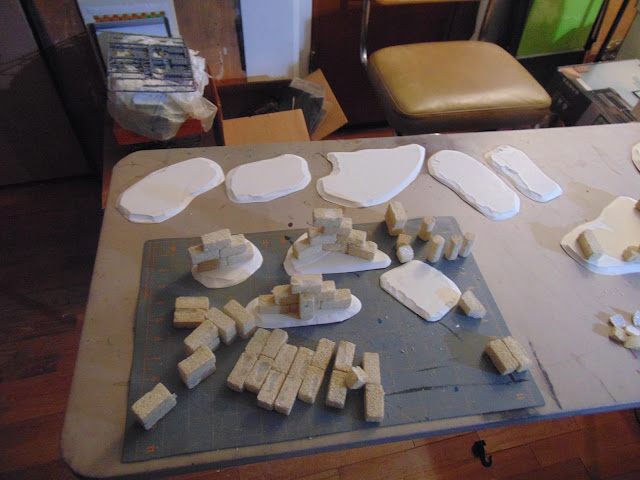 |
| Each base could be fairly large and surprising supported larger structures due to the bricks being made of foam. |
I ended up making a lot of scatter pieces, in two different shapes.
 |
| Glue bath. |
Now as I said, these were kinda flaky, but I use a lot of normal styrofoam. Giving the entire thing a bath in white glue strengthened it. This makes it harder, heavier and able to stand up to whatever chemicals I want to spray it with. In this case, it also cured the flakiness, but...
 |
| It was very sharp. |
Despite being flaky, it was also very, very sandpaper like in texture and I destroyed an entire set of sponge brushes applying the white glue to the structures.
 |
| After priming and flocking... |
Now that it was shielded from the harmful effects of being spray painted, the styrofoam went under a few coats of paint. A hunter green was applied to the base section, and over that a dark grey was used on the walls themselves. This created a neat 'algae' effect at the bottom of the walls, and that's a cool technique I may work with in the future.
 |
| This larger piece actually graduated to another project at this point. |
I blended together a flock base from GF9 products, mostly Green flock...but also some other scraps that were in the bin. There was some sand, some static grass and a few different grades and colors of flock from other projects I wanted to get rid of, so I used this somewhat random mixture to put down the base layer for the ruins. We're getting there, but not done yet.
Now we have to match the pieces to
the GF9 mat we're going to use.
 |
| Softly, the snows came... |
I wasn't too worried about flocking coverage at this point, because now it's time to use the soft-flake snow. I had tried to learn a lot about it before using it, and I felt confident going in. This is an interesting material to attempt to use for the purposes of a wargame, but after it dries it's quite hard.
 |
| Soft-flake snow, improperly mixed and drying on a wax-paper sheet. |
My first attempt at the snow was waaaay too thick. I didn't know how to handle it, so I put a little bit on a wax paper sheet and tried to mix it up. It dried very quickly. I then got out a glass bowl and mixed much, much more together until I had a rather soupy goop that could then be applied to the ruins.
 |
| It was pretty slow going until I figured it out. |
Eventually I got the hang of it and could apply the snow pretty easily. However, it does take on the color of the flock underneath as it dries, so in some cases I had to apply snow on two separate occasions to take out the 'green tone' that had bled into the snow. I'm guessing it's the dye on the flock leaching into the liquid glue, but I'm not a scientist.
 |
| The snow on the tundra is melting...IT'S MELTINGGGGgggg.... |
The soft-flake snow is something you kinda need to work with. You can watch videos all day long, read articles about it, or generally prepare to use it but it's still a very strange material unlike many others you may use. For myself, I have only recently started working with fancy model products like this.
 |
| If you look closely, you can see the beginnings of Woodland Scenics Water Effects icicles. |
Twenty-five odd years ago, this stuff wasn't all that common, and wargaming was kinda hard on terrain. Now I'm more willing to experiment with new stuff, as I have time and wherewithal. I suggest starting with something cheap, like styrofoam bricks and foamcore.
Check out the gallery in Part 2?


No comments:
Post a Comment
What do you think about that?