 |
| Welcome to Planet Suck. |
Several years ago, a member of our club bought a Zuzzy Mat when they were still available, the Sulfur Fields. We played with it a lot but never actually painted it. Today, I'm finally putting some color on it, despite years of trepidation.
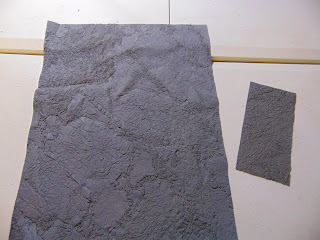 |
| Test pieces, so you don't crump yourself. |
|
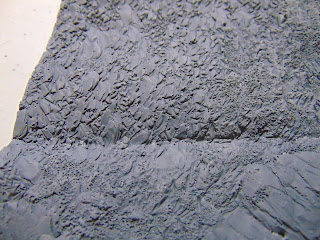 |
| Weird manufacturing defect / fold. |
|
The mat came with a few samples we could use to try out paint schemes and get used to the material, though the larger one was severely warped and the smaller one had a crease. I smashed them under books for a day but to no real avail. At this point, I still hadn't pulled the larger mat out of storage, and began to grow anxious.
 |
| It's bigger than it looks. |
The larger mat actually stood up a lot better, but it wasn't warped in the first place. There was a little crinkling around the edges but it stood up pretty good.The mat is made of a pretty thin vinyl, and had a SOME crinkling on the edges, mostly due to storage. It's been chilling for at least 6 years. Though we tried to be kind to it, it's very thin and I had always been wary around it.
So the plan is - "scumble" each terrain feature independently, then drybrush each independently. This will allow me to vary tones across the mat and yet normalize them in the end. The idea is that this mat is supposed to represent a "grey world" or barren moon...or even some terrible part of the Badlands.
 |
| That's an entire bottle of Nuln Oil. A big one. |
I bought some inks specifically for this project from the FLGS. Agrax Earthshade for the exposed rock, with Nuln Oil for the mineral deposits. Some Carroburg Crimson for the sediment around the fumaroles. After the inks, I'll apply some grey drybrushing to even out the color. To test, I applied it to one of the cuts they gave me.
 |
| Agrax, Carroburg and some light drybrushing. |
I liked the way the ink went on. It looked a lot better than some other attempts at a Zuzzy I'd seen, right off the bat. I wasn't entirely sure what textures to do what color, so I did the mineral deposits on this cut with both Nuln Oil and Carroburg Crimson. The whole thing was kind of confusing...again just due to the sheer size. I feel like if I had realized the actual number of textures (which aren't apparent from these samples) I could have made a better plot for the mat.
Yet, it was supposed to be an alien moon, so who cares? The mineral deposit that was colored with Nuln Oil and highlighted with Astronomican Grey provided the sharpest contrast, so I went with that. The entire time I worked on this project, I would remain unsure of myself on that decision. I doubled down anyway.
 |
| You gotta start somewhere, if you're not using a paint roller. |
At first my thought was to do the mineral deposits all over the map. There were basically four types of terrain on the mat - rock slabs, broken rocks, fumaroles and a set of some kind of mineral deposits. Honestly, I couldn't make sense of things until I started painting the actual large mat. Even looking at the pictures available online didn't give much guidance.
After I had run through a full bottle of Nuln Oil in about an hour and a half I realized I had grossly miscalculated the amount of ink this was going to take. It was about this time I also realized how long it was going to take to paint like this. The whole thing became pretty haphazard after this, just from the sheer size of the mat and the detail on it. Honestly, tackling it by myself almost overwhelmed me.
I considered doing what everyone else with a Zuzzy has done up until this point - getting some cheap acrylic from the hobby store and a paint roller. After looking at the sample I had painted though, there was something that said that same effect would not turn out with anything but the expensive inks. It just wouldn't settle in those cracks like that, even though that filling in all that texture was what was using so much ink.
I decided to give it a shot and paint the next texture in sample size. I found one of the smaller fumaroles (?) and dropped Carroburg Crimson on it to see how it looked. I really liked how it came off on the sample, but this texture was different than that. If it took too much ink or didn't look right, I'd be off to get some cheaper paint before I got too much further invested in it.
...and it didn't work. The ink didn't settle right, so I went to my cabinet, got some acrylics, and replotted the whole project.
Now the project looked like this:
- Mineral Deposits - red with black/brown wash
- Sulfur Flows - red/brown with light highlight
- Stone - black.brown wash and Light grey drybrush?
Right off the bat, the project time extended as the acrylics take a longer time to dry. However, the price and annoyance to me went down drastically and I decided to go ahead with what I had. A little while later, I said "don't worry, be happy" to myself and just started painting with acrylics, inks, and anything else I happened to have handy. It started to go much quicker.
In practice, I saw I needed to do it section by section rather than feature by feature, due to physical limitations of my paint area. So I decided to do it by halfs / quarters while I finished the colors and washes. Drybrushing would be done all over at once.
 |
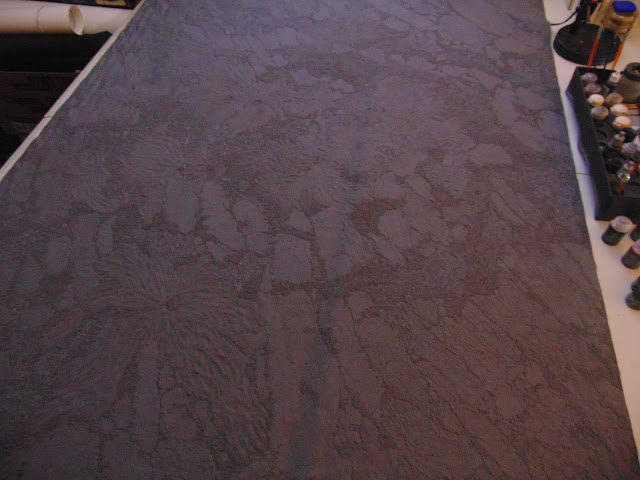
| After the ink there were varying tones across the map. The light grey drybrushing brought it all together. |
It took an unbearably long time...several hours across many days to get something I was satisfied with despite the limited color palette.
 |
| "Yo, droid. Beer me." |
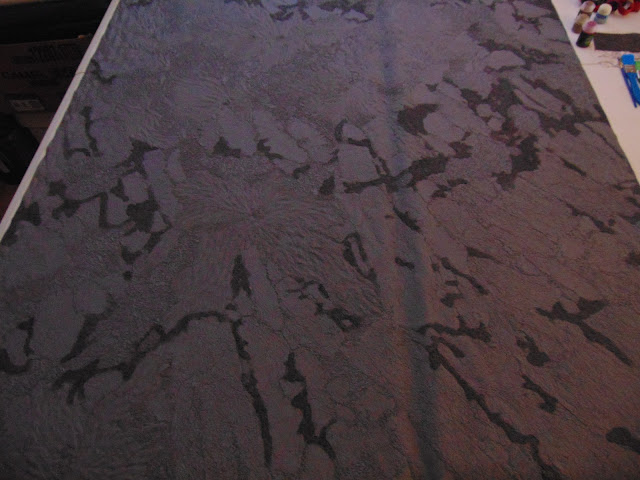
It took several passes. The greys of the stones were the biggest single section, though there was some variance in the tones of the inks underneath to give it a more natural feel. The reds, browns and ochre of the fumaroles took comparatively little time.
 |
| All kinds of rocks and stuff. |
Nice enough for outer space! Giant rocks, broken ground and flowstone...
 |
| "It's ok. We're from the holo-net." |
The blending between the edges had me worried at first, with my obsession with clean lines. However, this is dirt and stuff. The scumbling and drybrushing created a nice blend effect with the kind of fuzzy edges you see in the space-yard. Presumably.
 |
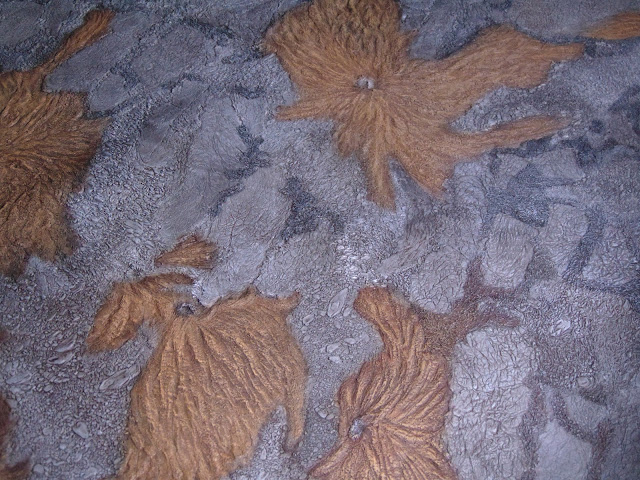
| The fumaroles are dense near the center of the board, but are spread pretty evenly. |
I wasn't truly sure of the colors of the fumaroles and sulfur flows until the very end. It ended up looking a lot like the sample on the Zuzzy site, but far less busy. Which is nice, since terrain will be stacked on it.
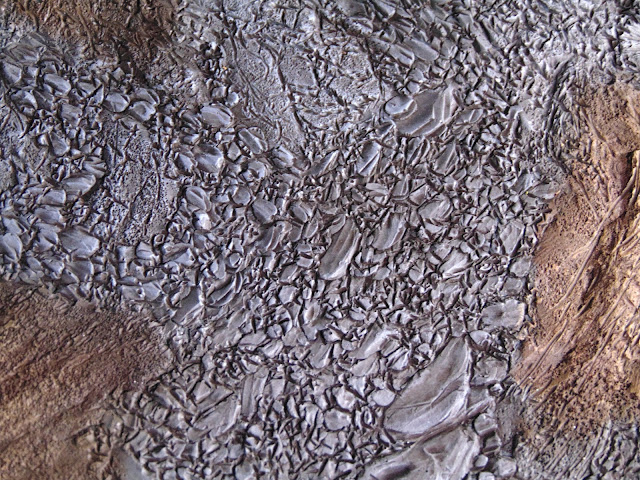 |
| Check out the texture on that broken stone. MMMMmmmm... |
The final stage was to give it a light matte coat, to protect (allegedly) the work I've put in. That acrylic can be vulnerable to moisture, but that's a concern around the table anyway. Make sure to stick your beer in the correct receptacle when mining sulfur or iron on Planet Suck.
 |
| Watch out for the Double Bunghole, a notorious geyser system near the center of the board. |
Zuzzy doesn't exist anymore. I mean, the mat is really amazing, but it is kind of a monumental task to paint it in any fashion other than getting the paint rollers out. Honestly, I didn't pay that much attention to detail and it still took quite some time to get finished the way I wanted it. Yet, it's done, it looks awesome and now I'm going to populate it with cliffs, crags and industrial equipment!
 |
| "Dropship in the pipe. Planetfall in 5...4...3..." |


No comments:
Post a Comment
What do you think about that?